NavyFlame / Seller's guide

From the first connection
to selling smoothly.

The complete step-by-step instructions. 19 chapters, panel screenshots, automation recipes and a roll-out plan.

Version: 8 September 2026 • Current guide: navyflame.com/przewodnik

The screenshots show the public demo on sample data. What you can do depends on the connection, the plan and the permissions. The demo does not confirm that an operation was carried out at an external provider.

Contents

  1. From looking at the panel to your own account
  2. Arrange the dashboard around your daily work
  3. Set up the company, the people and their access
  4. Connect your first sales channel
  5. Move the catalogue and history without chaos
  6. Put stock, SKUs and availability in order
  7. Prepare offers, prices and publication
  8. Take an order from arrival to fulfilment
  9. Connect the accounting and set up documents
  10. Shipping, carriers and labels ready for work
  11. The packing bench, step by step
  12. Automations that put the team's work in order
  13. Messages and e-mails that help the customer
  14. Returns, complaints and calm case handling
  15. Wholesalers, deliveries and checking real stock
  16. Reports and prices under your control
  17. Monitoring and solving problems without guessing
  18. API, webhooks and access control
  19. Your plan for the first seven days
Chapter 01

From looking at the panel to your own account

Start with the process you want to put in order. Then create an account, pick a plan and prepare your own workspace.

What you gain

The very first setup shows you whether NavyFlame fits how you sell: from pulling in an order through to the document and the shipment.
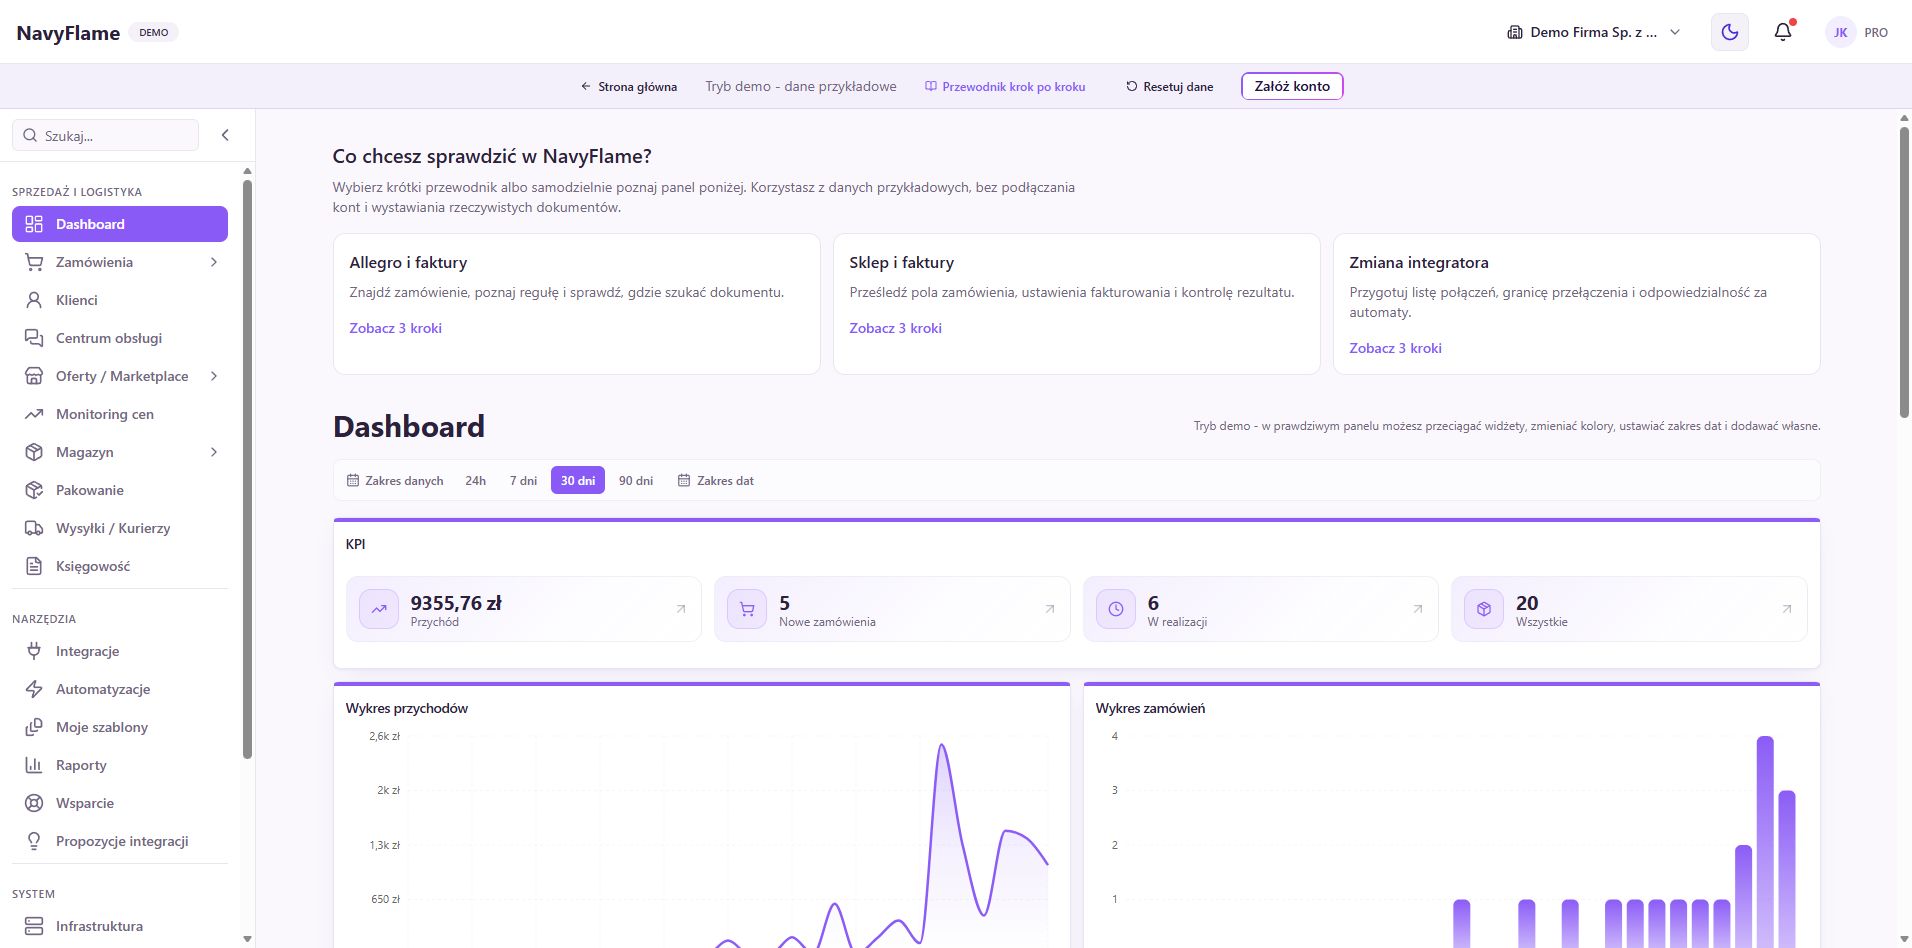
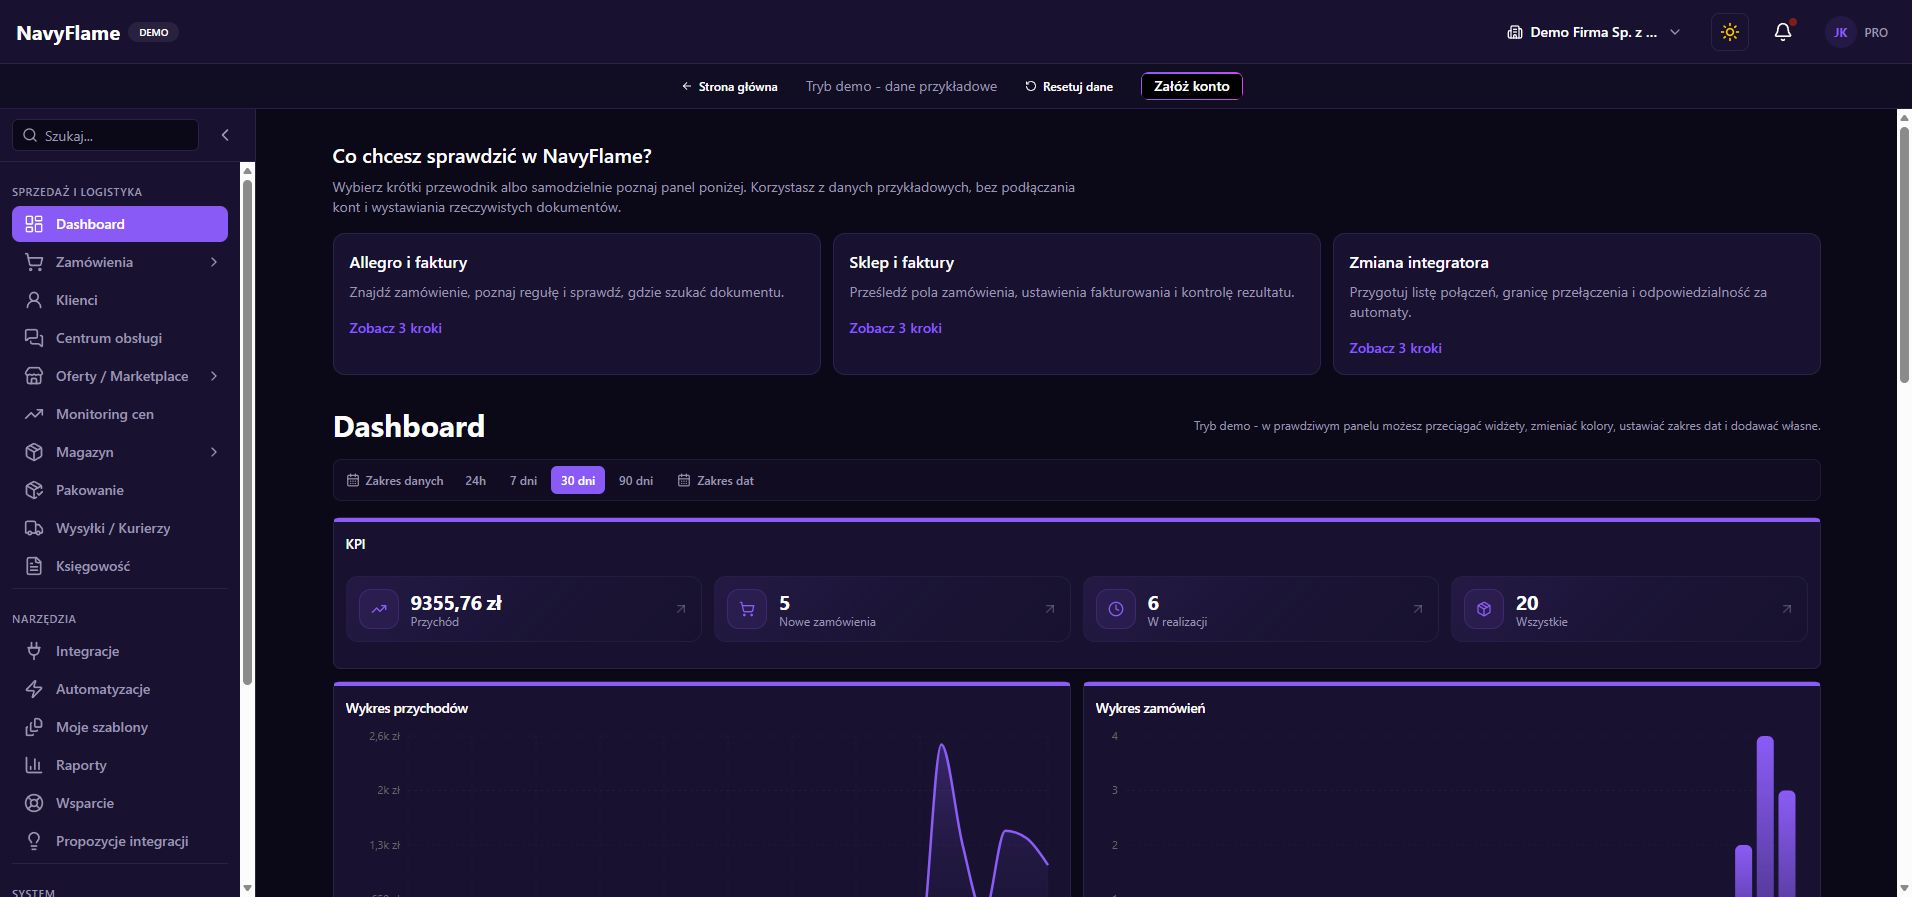
The NavyFlame dashboard on sample demonstration dataThe NavyFlame dashboard on sample demonstration data
The dashboard is the starting point. Your own figures appear once sources are connected and data has been pulled in. Click the image to enlarge. A screenshot of the public demo with sample data.

Step by step

  1. Look at the demo with a concrete task in mind

    Open the demo and choose Dashboard, the overview of your selling. Then move on to Orders, Stock and Accounting. Pick a single scenario, for example handling a paid order from Allegro. The demo shows the panel on sample data. Connecting your own accounts, real sales and real documents need your own account and the matching integrations.

    Check: You can point out where a member of staff will find the order, the goods and the accounting document.

  2. Write down the scope of the first run

    Have ready the name of one sales channel, access to its own panel, your company details, where stock levels come from and the name of the accounting system you use. Note who decides on prices, who packs and who resolves errors. That short set of decisions carries you through the following chapters without interrupting the setup.

  3. Create an account through Registration

    Give your first name, surname, e-mail address and a password meeting the requirements shown next to the form. Confirm the password and read the required consents. For the owner account, use an address the company will keep access to. If you already have an account, choose Sign in rather than creating another.

  4. Check the message about your e-mail address

    After registering you may be signed in automatically and taken to the plan selection. Open the message confirming your address and do what it asks. If you cannot see it, check the spam folder and the address you typed, and use the resend option where the panel offers one.

  5. Compare the current plans

    On the plans page, check the range of features, the limits, the billing period and the price matching your case. Weigh them against your order count, the size of your catalogue and how your work is organised. Read the length of any trial and the payment terms from the current offer and the order summary, because they depend on the plan.

    Check: You know what amount will apply, and for what period, after any trial.

  6. Fill in the order details and pick your panel address

    Work through the purchase form, check the billing details and the final summary. Then follow the screens for choosing a subdomain and preparing the environment. Pick a name your team will recognise. Wait for confirmation that everything is ready before you start connecting shops and importing data.

  7. Work through the Tutorial steps

    Open the Dashboard and use the Tutorial card: fill in the company details, check the subscription, add the first integration and set up an automation. Some steps offer Show me how. A staff account may see a shorter list, because managing the subscription is the owner's job.

  8. Define what a successful roll-out looks like

    Write down one verifiable result: a correct order from the chosen shop, matching SKUs, the right document and shipping handled properly. Walk that path by hand first, on a suitable order. Only once it is confirmed should you extend the setup to further channels and automatic actions.

    Check: You have an account, a working panel and a short list of things to verify on your own data.

Done when

What this chapter gives you

You know why you are rolling out NavyFlame, you have access to your own panel and you can set up the first complete sales process.
Chapter 02

Arrange the dashboard around your daily work

Learn the navigation and set up a repeatable daily review: connections, new orders, documents and anything needing attention.

What you gain

Instead of starting in several sellers' panels, you open one view of the situation and move straight to what needs doing.

Widgets and charts on the NavyFlame dashboard in the demoWidgets and charts on the NavyFlame dashboard in the demo
Pick the data that helps you make the next decision, and set a comparable date range. Click the image to enlarge. A screenshot of the public demo with sample data.

Step by step

  1. Get to know the main areas of the panel

    From the menu, work through Orders, Offers, Stock, Integrations, Automations and Accounting in turn. Orders is where selling gets fulfilled, Offers shows what is published in each channel, and Stock holds the tidy catalogue. What is available also depends on account permissions, so a member of staff may see a narrower set than the owner.

  2. Set the data range on the Dashboard

    In the Data range section, pick a ready-made period or your own dates. Use a short range for day-to-day work, and full, comparable periods for comparing sales. Before drawing conclusions, check that history has been pulled from every channel you are looking at and that the range covers the days you need.

    Check: You can say which period the numbers on screen refer to.

  3. Adjust the layout and the set of widgets

    On the Dashboard page, use the layout editor and the widget catalogue. To begin with, choose sales results, recent orders, integration status and document status. Put them in the order that matches your decisions. Drag and resize the available elements, and save the layout with the editor's buttons when you are done.

  4. Start the day with the connections

    Check the integrations widget and go to Integrations if an error or a re-authorisation notice appears. No new orders does not always mean no sales. First establish whether the source is connected and pulling data, then compare the newest order with the shop's own panel.

  5. Move on to the order queue

    Open Orders and set the status, payment and source that suit the work in hand. Watch the dates and dispatch deadlines where the source passes them on. Separate orders that are ready to fulfil from those needing a payment, address or availability question resolved first.

  6. Check the documents that need action

    Go to Accounting and look through the document statuses. A pending document, or one that ended in an error, needs its details checked; the existence of an order does not mean an invoice was issued. Work out whether the problem is with the buyer's details, the provider's configuration, a rule, or delivery of the document.

    Check: For a problematic document you know the reason and the next step, instead of redoing the whole order.

  7. Finish the review with a quick look at the catalogue

    In Stock, check the goods affecting today's fulfilment, and in Offers the rejected or inconsistent publications. If several people work here, agree who handles each queue. A shared view on its own does not replace a clear division of responsibility for price, stock and shipping.

  8. Compare results once the data is in order

    Use the channel charts and the best-selling products once imports and product identification are consistent. Sales figures describe the data the system holds. Before making a purchasing or marketing decision, check the date range, whether every source is complete, and how cancelled orders are counted.

Done when

What this chapter gives you

You have your own order for reviewing the day and know where to go for any particular problem.

Chapter 03

Set up the company, the people and their access

Fill in the billing details, invite the team and grant access that matches what each person actually does.

What you gain

Everyone works from their own account, and the company details and responsibility for handling orders are in order from the start.

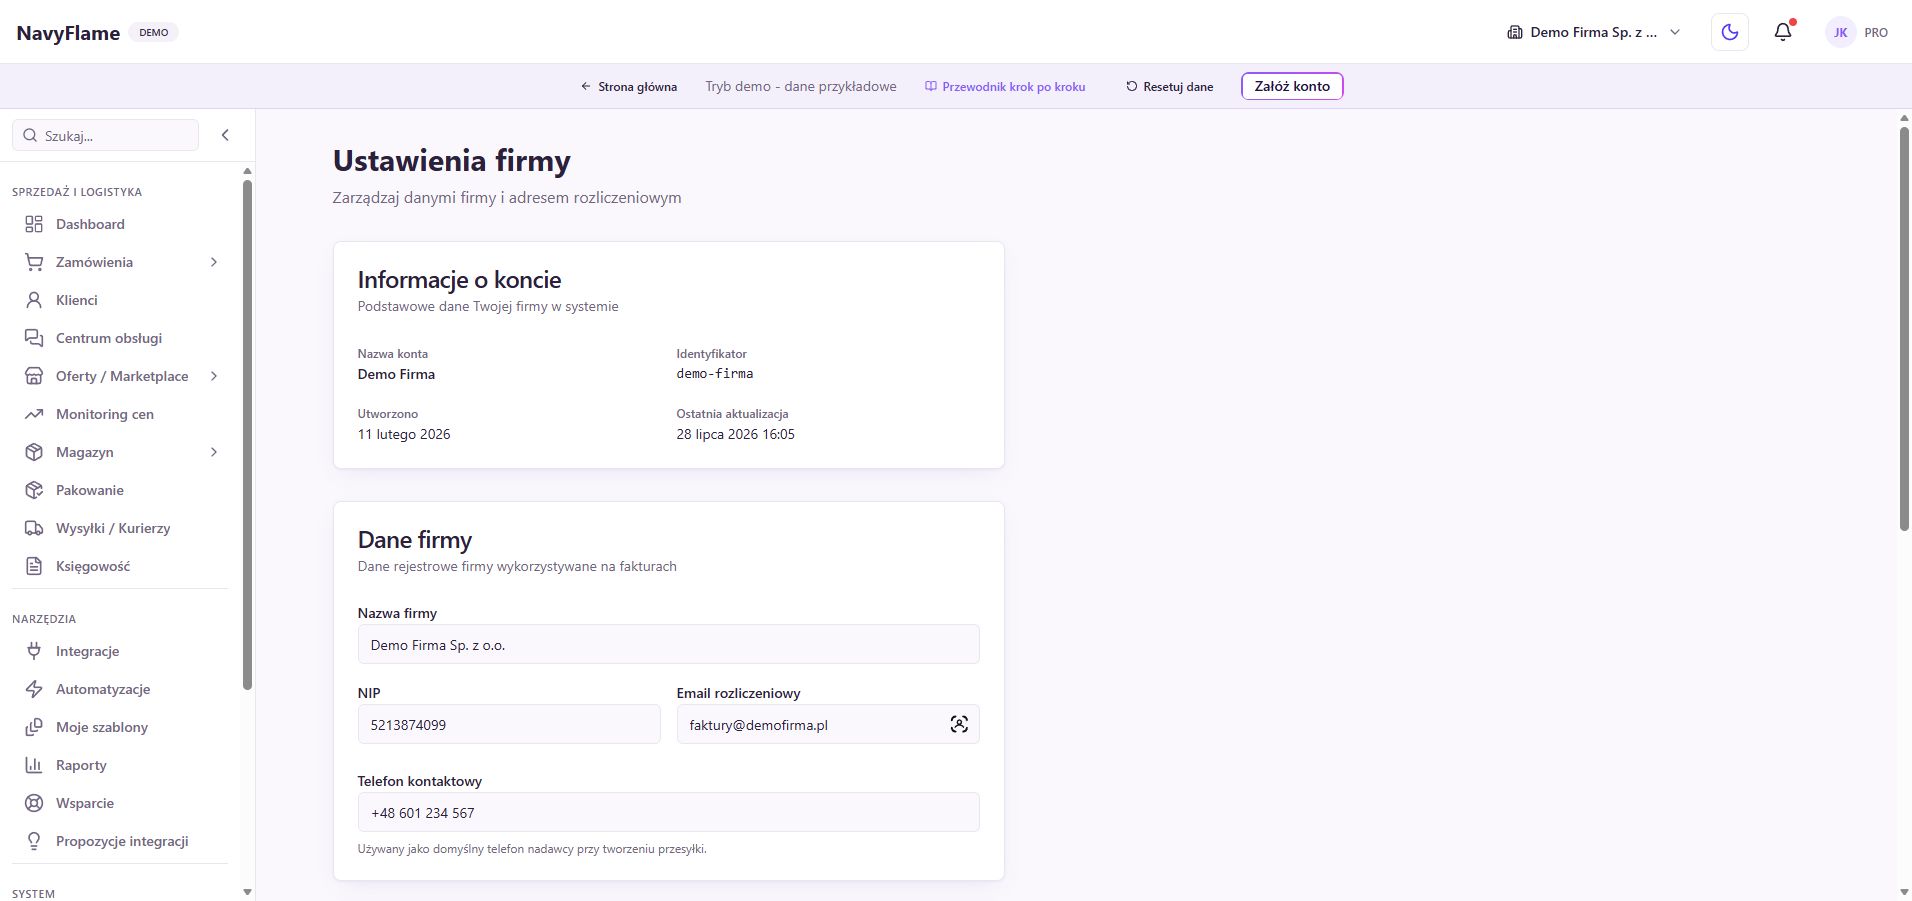
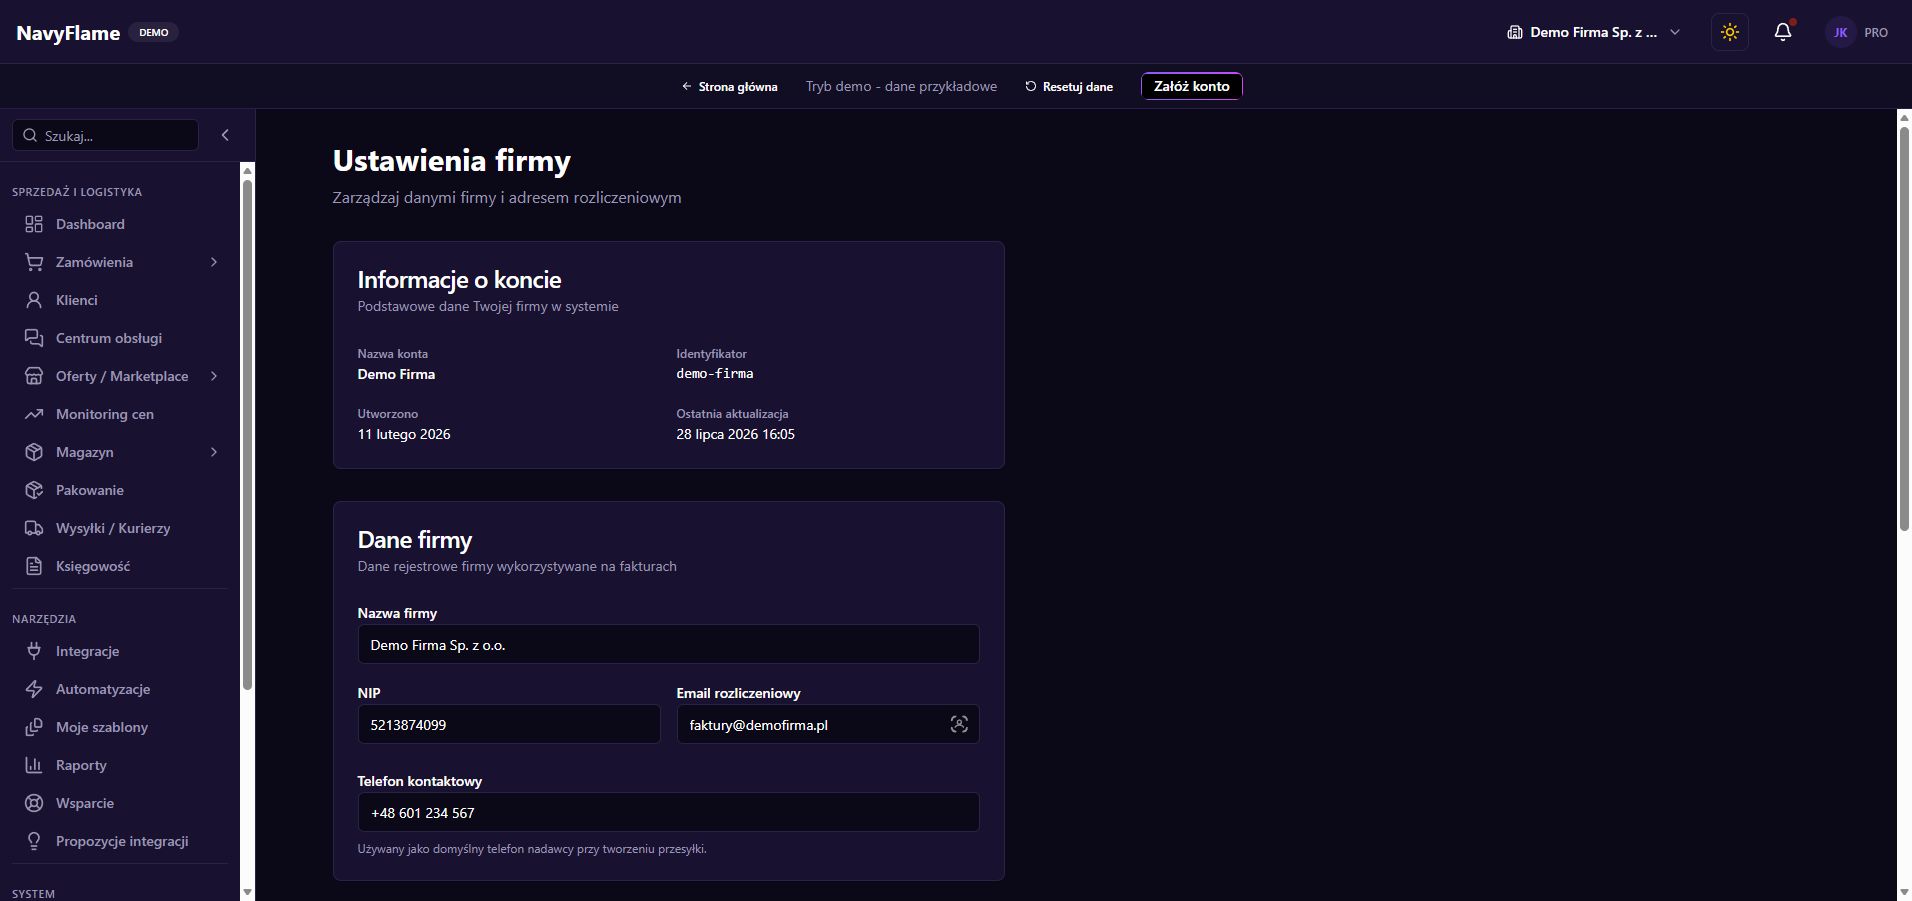
The NavyFlame account settings area in the demonstration panelThe NavyFlame account settings area in the demonstration panel
Company details, profile and users put the whole team's work in order. Click the image to enlarge. A screenshot of the public demo with sample data.

Step by step

  1. Open the company settings

    In the account area, go to the company details. Check the account name, then fill in the company name, tax identification number, billing e-mail and contact phone. Use the details of the entity holding the subscription. The issuer shown on sales documents is something you check additionally in the connected accounting system.

  2. Save the full billing address

    Fill in the street, building number and any unit number, postal code, town, region and country. Click Save changes, then read the details back after saving. Pay attention to the billing e-mail address, which often should differ from the address of whoever handles orders.

    Check: The saved form shows the correct entity and address, without the details of someone who is merely running the roll-out.

  3. Complete your own profile

    Go to Profile, check your first name, surname and time zone, then save. The right time zone makes working with dates easier and helps you compare events with the shop's panel. Treat the account address as an individual identifier for access, even if several people hold the same role in the company.

  4. Look after the account password

    If you need to change the password, use the Change password section in Profile: enter the current password, the new one and its confirmation. Use a unique password kept in a password manager. Protect access to the mailbox tied to the account as well, using whatever its provider offers.

  5. Invite the first member of staff

    Open Users, click Invite, give an individual e-mail address and click Send invitation. Ask the person to open the message and accept access on the right account. The Pending invitations list shows who has not joined yet.

  6. Review the roles and the permissions attached to them

    In Users, click Manage roles. Look through the existing roles and their read and write scope before creating your own. Someone who packs usually needs a different set of actions from someone who manages prices. Name the role so the team understands what it is for, and assign it to the right person.

  7. Check the access from the staff account

    Ask the invited person to sign in and carry out an ordinary task from their own duties. Verify that they can see the page they need and use the right button. Do not test permissions from the owner account alone, because it has a different scope of access to the panel.

    Check: The member of staff completed the task from their own account and knows who to tell if access is missing.

  8. Tidy up invitations and later changes

    Cancel any pending invitations that are no longer needed. When someone's duties change, change the roles assigned to them; when they leave, withdraw access using the operation available in the panel. Keep someone responsible for the owner account and the subscription. It is worth repeating this review after every change in the team.

Done when

What this chapter gives you

The company details are correct and every person on the team has their own access, matching their work.

Chapter 04

Connect your first sales channel

Choose an integration, go through the authorisation the provider requires and check the first data from a specific account.

What you gain

Orders from your channel land in one shared place, from which you can run the rest of the sales process.
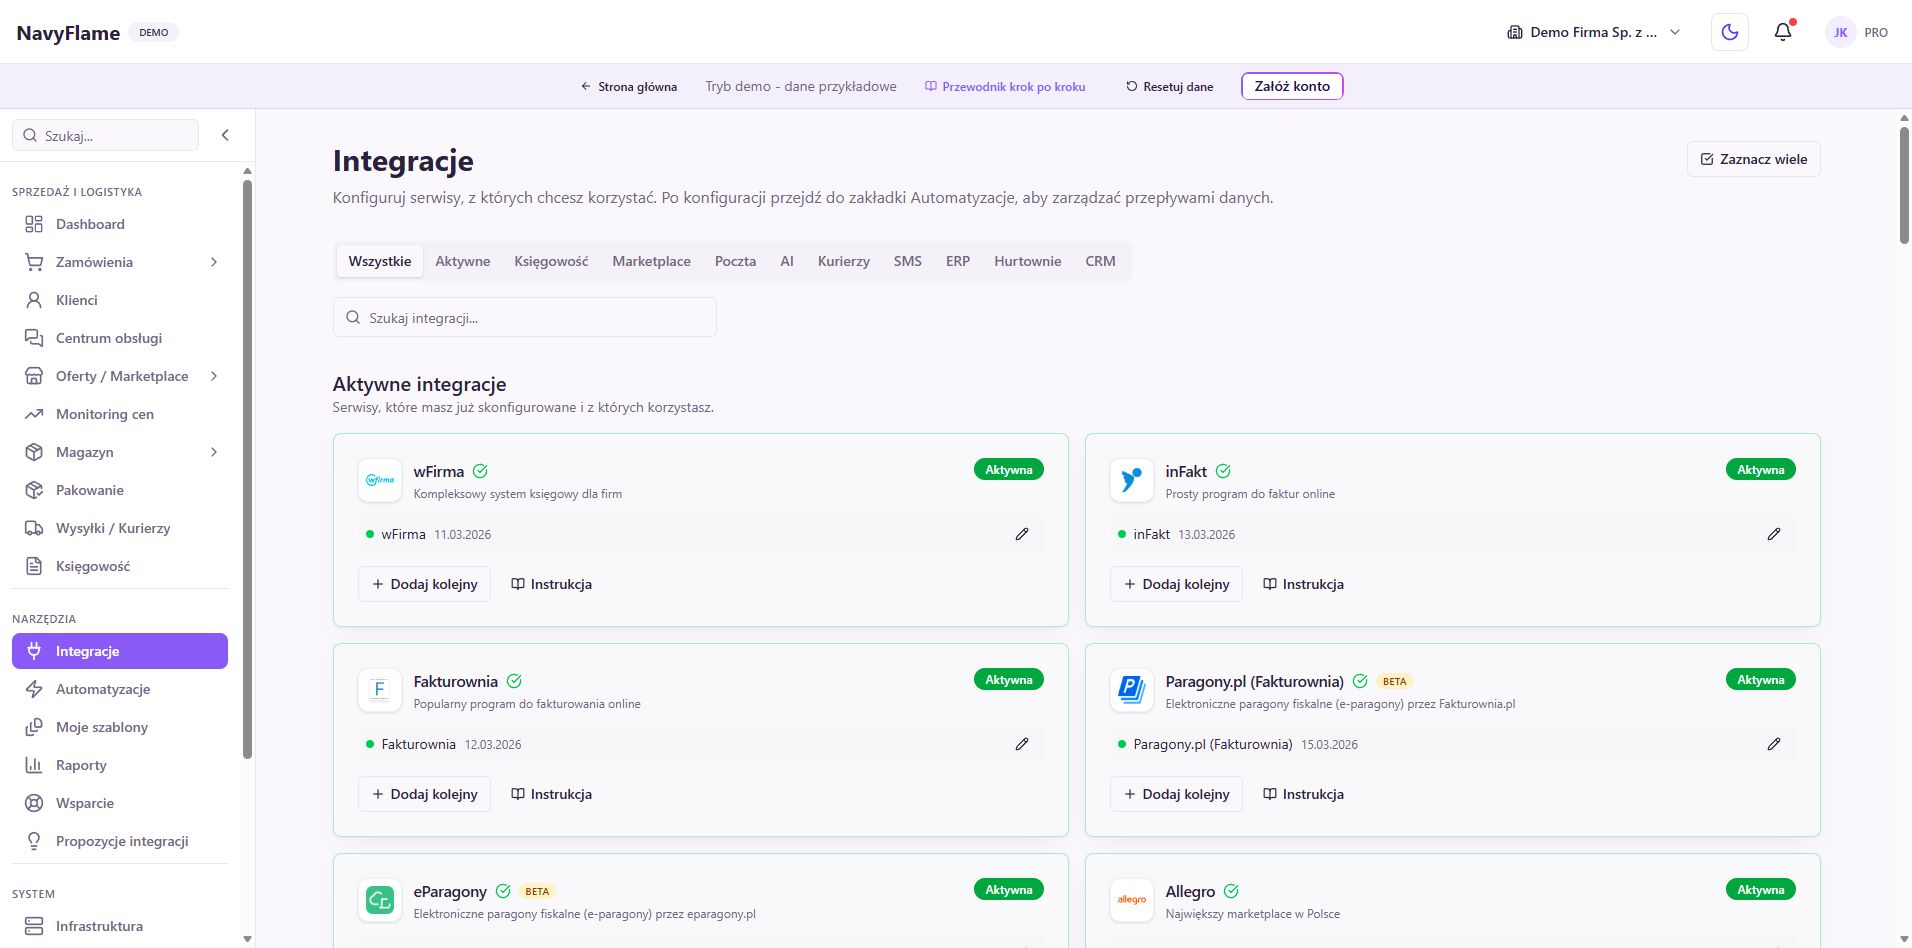
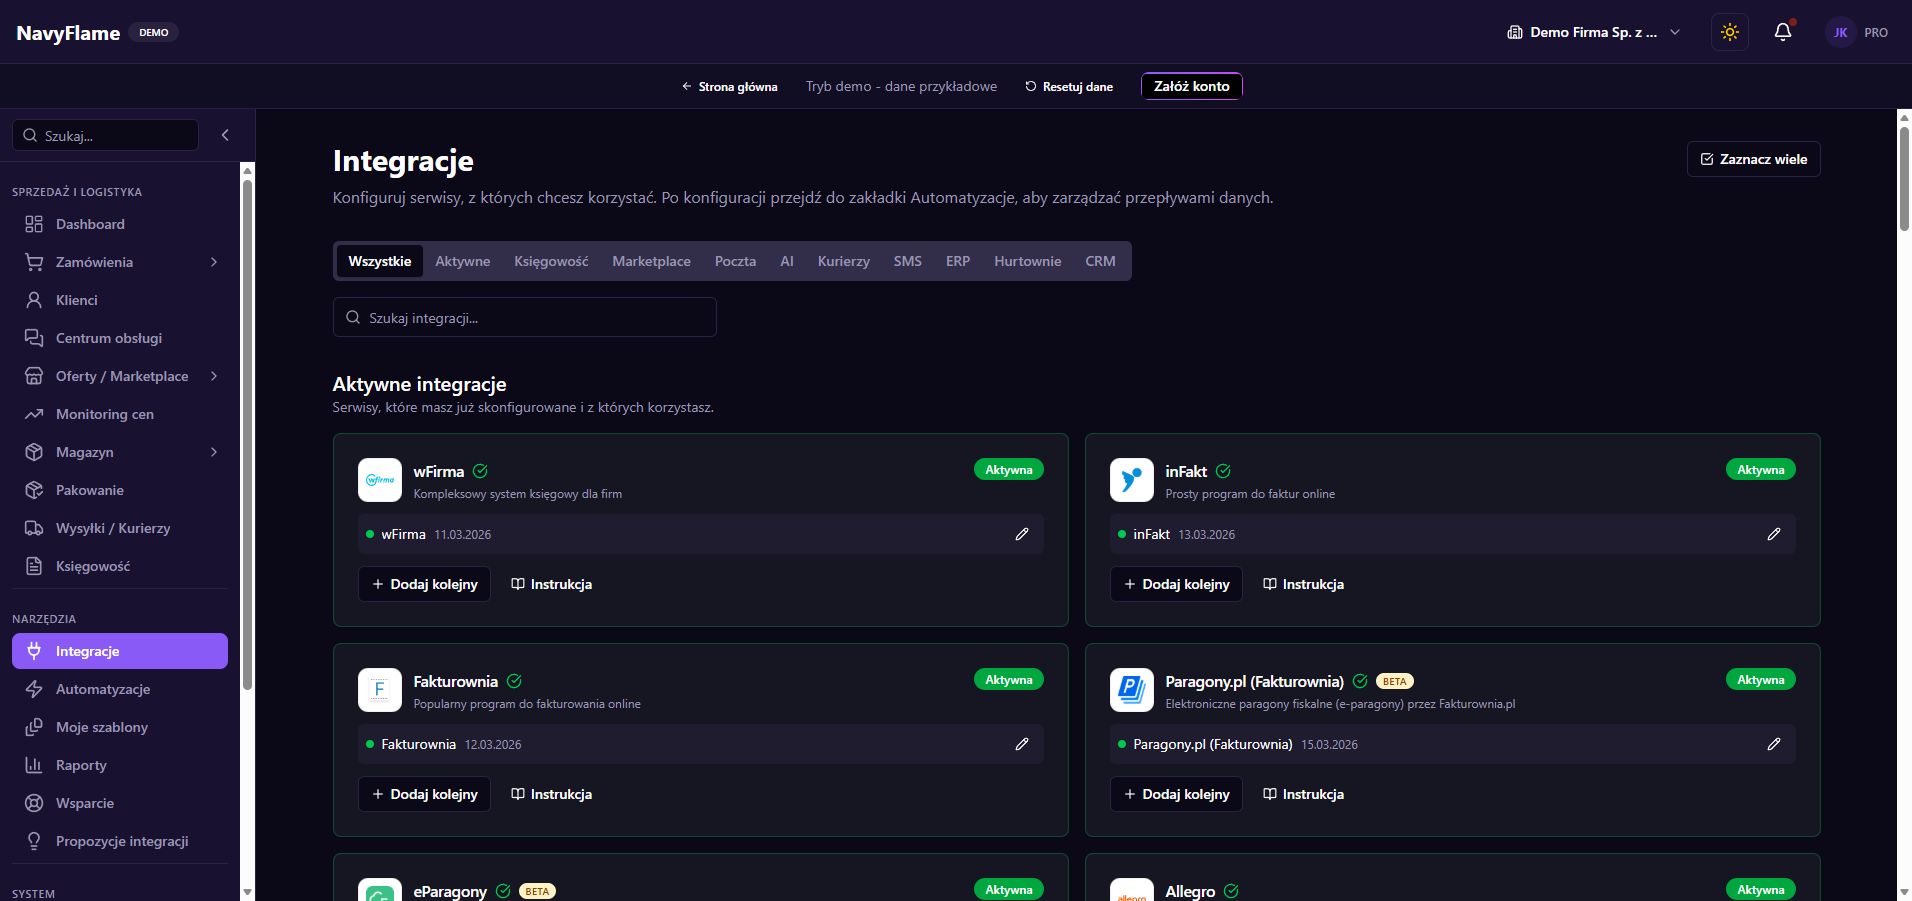
The list of sales integrations and services in the NavyFlame demoThe list of sales integrations and services in the NavyFlame demo
You configure each connection to the provider's requirements and check it against data from the right account. Click the image to enlarge. A screenshot of the public demo with sample data.

Step by step

  1. Pick the service in Integrations

    Open Integrations, find the channel by name and choose Configure. Read the instructions for that service. The forms differ in how you sign in and in the range of actions supported. To begin with, connect an account whose orders and offers you can easily compare in the source panel.

  2. Give the connection an unambiguous name

    Use a name that points to the brand, shop or market, for example Main shop PL. If you have several accounts on the same platform, each should be recognisable without looking at credentials. Check the environment and the country of sale too, if the form shows those fields.

    Check: You can match the integration name to one specific seller account without ambiguity.

  3. For Allegro, use account authorisation

    Enter the Allegro account name and choose Production for real selling. Click Connect to Allegro, sign in to the right account in the Allegro window and accept the access. On returning, the authorisation details fill in by themselves. Use Next to go to the summary; do not create your own application just for this form.

  4. For WooCommerce, prepare REST API keys

    In WordPress go to WooCommerce > Settings > Advanced > REST API and add a key for an authorised user with Read/Write scope. Copy the Consumer Key and Consumer Secret. In NavyFlame, give the shop address with https:// and both keys. The address should point at the shop, without a /wp-admin or /wp-json ending.

  5. For Shopify, follow the dedicated instructions

    Open the Shopify instructions linked under this chapter. They walk you through creating an app, the data scopes required, releasing a version and installing it on the shop. What goes into the NavyFlame form is the domain in the form your-shop.myshopify.com, the Client ID and the Client Secret. Check access to customer data and older orders if you need the history.

  6. For other services, use their own fields

    Do not copy the sign-in method from another marketplace. Kaufland, for instance, needs a Client Key and Secret Key plus the right country, while IdoSell needs the panel address and an API key. The full sequence is in the instructions for that particular integration. The account and the credentials must belong to the same service and the same environment.

  7. Test and save the connection

    Use Test connection and read the result. If the test reports an error, check the address, the account chosen, the access scope and whether the keys are complete. Once the result is good, finish saving the form. The test confirms the access that service checks, but it does not replace checking an order and an offer after the first synchronisation.

    Check: The saved integration points at the right account and the connection test came back clean.

  8. Compare the first result with the source panel

    After a pull cycle, open Orders or Offers and look for a specific number you know from the seller's panel. Compare the source account, the amount, the line items and the date. In many integrations orders are pulled on a schedule, so they need not appear the instant a purchase is made. History is pulled in a separate step.

Done when

What this chapter gives you

You have a connection to a clearly labelled account and confirmed data from your first sales channel.

Chapter 05

Move the catalogue and history without chaos

Choose how to import, settle the product identifiers and check the results before moving the whole catalogue.

What you gain

Work carries on without a break: existing goods can be updated, and earlier orders brought into current handling.

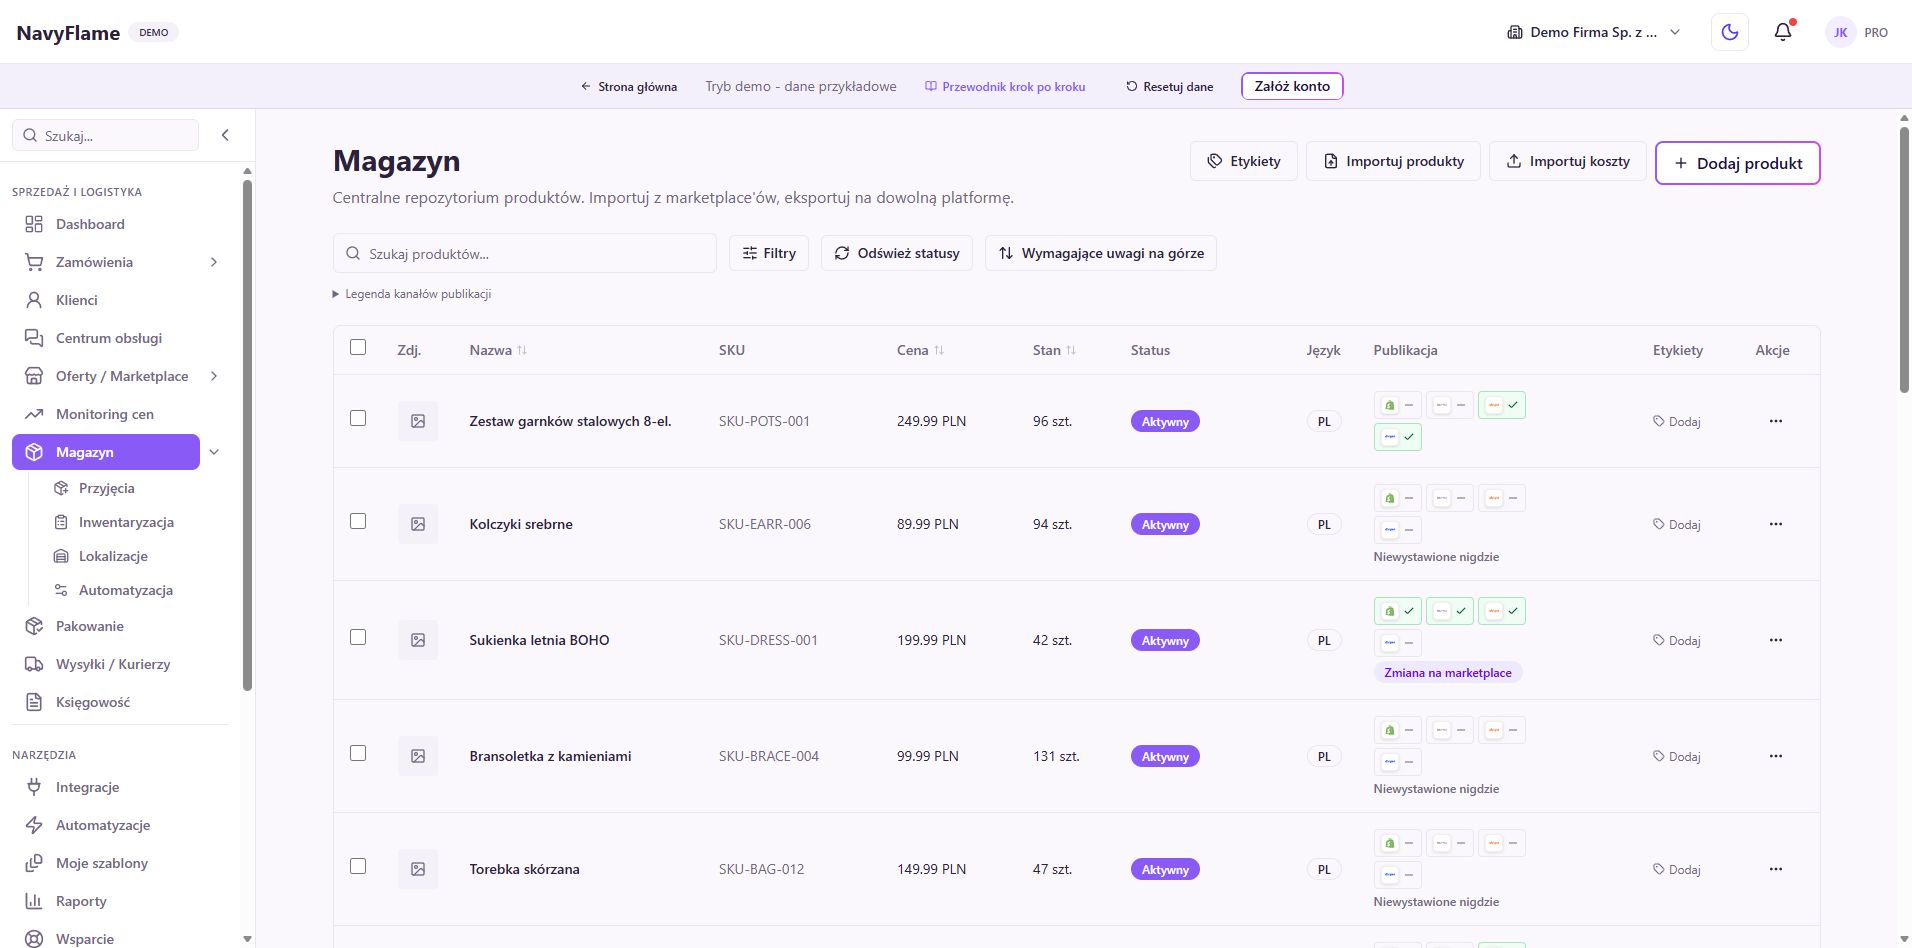
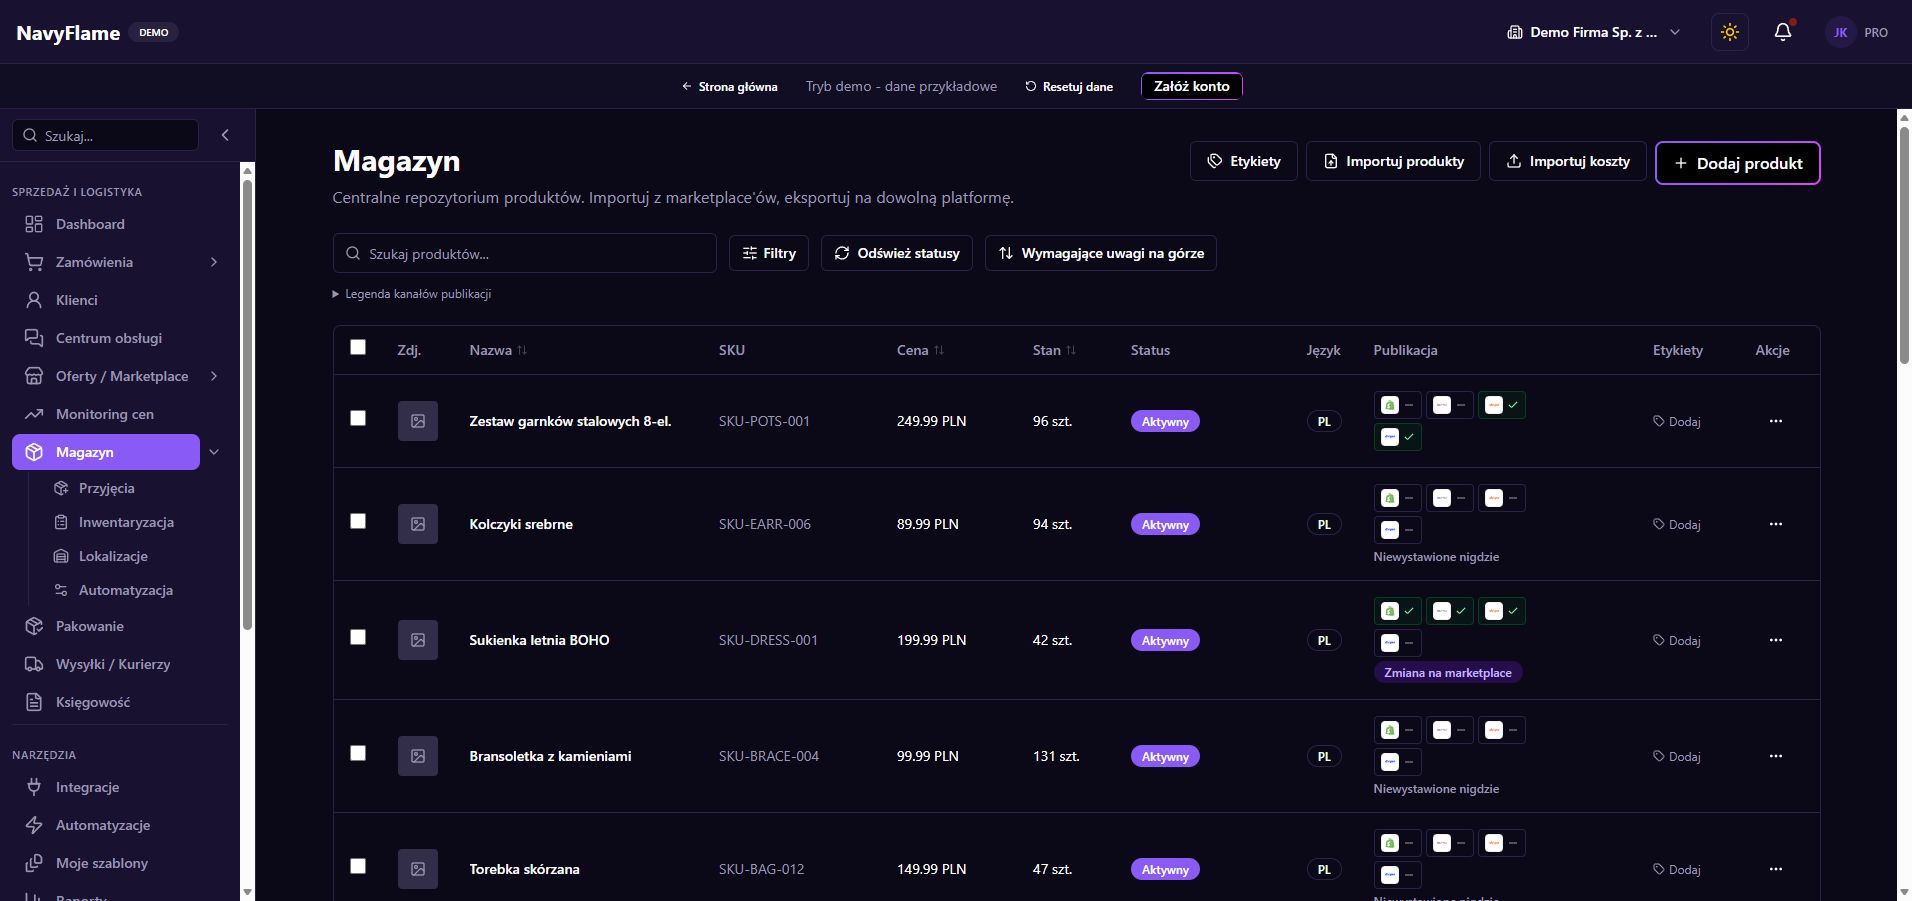
The product catalogue in the NavyFlame demo warehouseThe product catalogue in the NavyFlame demo warehouse
Before importing the whole catalogue, check a few products representing different kinds of data. Click the image to enlarge. A screenshot of the public demo with sample data.

Step by step

  1. Settle the sources and the migration boundary

    Decide where products, stock levels and earlier orders come from. Write down the date from which the new process is to handle selling. Check the automations running in the previous tool, especially invoicing, messages and stock updates. Two systems doing the same thing can cause duplicate actions even when the data imported perfectly.

  2. Prepare stable identifiers

    Go through the SKUs and EANs in the source file and in the sales channels. The same variant should carry a recognisable identifier, and different variants should not accidentally share one SKU. Do not change the codes between import attempts. Keep a copy of the source file with the date it was exported.

  3. Upload the catalogue from a file

    In Stock, click Import products. In the Upload file step choose CSV or XLSX; you can use Download CSV template first. In Match products by, choose SKU or Barcode (EAN). Set Create new and update existing, or Only update existing, depending on what the operation is for.

  4. Check the mapping and the preview

    Click Next: column mapping and compare how the fields are assigned. Watch the name, the chosen identifier, the price, the stock level and the variant data. Rows sharing a product key may form variants, so check how they group. In the preview, weigh the number of new, updated and skipped items before confirming the import.

    Check: You understand which products will be created and which changed, and there are no unexplained mapping errors.

  5. Confirm a small batch and look at the goods

    Start with a representative sample: an ordinary product, a variant and an item that already exists. After the import, read the summary and the row errors. Open those products in Stock and compare identifiers, prices, units and quantities with the file. Only once the result matches should you repeat the process for the rest of the data.

  6. Use existing offers as a source for the catalogue

    If your goods are already in a sales channel, go to Offers, choose the source and select the items to import into Stock. Check the marks on items already imported. With several channels, compare SKUs especially carefully: one product card may correspond to several offers, and not every offer has to create a new item.

  7. Choose how much order history to bring

    In Orders, click Import history and set the range separately for each available source. The form shows the options that particular integration allows, for example the whole history or a set number of recent days. For some connectors, importing history is not available. The actual range also depends on the access the provider granted.

  8. Judge completeness, and only then switch the process over

    Compare a few of the oldest and newest orders from the declared range. Importing history can be repeated without creating another copy of the same order within that source, but do not treat that as automatic merging of different accounts or as migrating every note from another system. Agree which system carries out further actions.

    Check: The sample of catalogue and orders matches the source, and one agreed process owns documents, stock and shipping.

Done when

What this chapter gives you

The catalogue and the chosen history are checked, and starting work in NavyFlame has clearly settled data sources and responsibilities.

Chapter 06

Put stock, SKUs and availability in order

Settle the product catalogue, the units and the locations. Then decide when to reserve stock and how availability reaches your offers.

What you gain

One tidy product can feed several channels, and the team can see what is selling and how much stock is left to work with.

The list of products, identifiers and stock levels in the NavyFlame demo warehouseThe list of products, identifiers and stock levels in the NavyFlame demo warehouse
Consistent SKUs and correct offer links are the basis of predictable stock synchronisation. Click the image to enlarge. A screenshot of the public demo with sample data.

Step by step

  1. Check the card of a representative product

    In Stock, open a product or choose Add product. Fill in the name, SKU, barcode and the unit that suits the goods you sell. Check the variants and the photographs. Goods sold by the piece and goods settled by weight each need the right base unit, so that quantities carry a clear meaning.

  2. Link the product to its offers

    In the product details, check where it is published across the sales channels. Compare the SKU, the variant and the target account. Two offers for the same goods should use the right catalogue card. Do not join different sizes or colours merely because they share a similar name or the same photograph.

  3. Settle the source of truth for stock

    Agree whether stock is held in NavyFlame, in an ERP, in the shop, or fed from supplier data. Describe the direction of updates and who is responsible. Then configure the integrations to match that model. Simply connecting several systems does not decide which of them should overwrite the quantities in the others.

    Check: The team knows where it corrects the real quantity and where the other channels should read it from.

  4. Add locations and look at goods receipts

    Go to Locations and use Add location to reflect how goods are actually split up in storage. Use short, unambiguous names matching the labels on site. Read up on Goods receipts and Stocktaking before changing larger quantities, so that a correction matches a real warehouse event.

  5. Open the stock flow settings

    In the Stock settings, go to the Stock flow tab. The option Enable automatic stock flow governs reserving stock and updating offer availability. It is off by default. Before ticking it, check that the catalogue, the links and the quantities are consistent for the products you sell.

  6. Choose the moment of reservation

    In When to reserve stock, choose On every order or Only once paid. The first takes available stock earlier; the second waits for payment information. Match the decision to your process, including cash-on-delivery orders and payments that may be confirmed late.

  7. Set zero handling, the interval and a safety buffer

    Decide whether to publish an offer as unavailable at zero stock, and set the synchronisation interval. Enter any buffer in the product's base unit. Availability to ship is the stock level less reservations and the buffer, never below zero. The buffer also applies when stock is passed on by hand, independently of the main automation switch.

  8. Save, then check a full availability change

    Click Save settings. On a controlled order, check that the reservation appears at the chosen moment, what availability remains, and the result of updating a specific offer after a synchronisation cycle. If the numbers differ, compare the unit, the variant, the buffer and any other system writing stock before extending the process to the whole catalogue.

    Check: The quantity shown in the channel matches the availability you settled, and the reservation concerns the right product.

Done when

What this chapter gives you

You have legible goods, a settled source of stock and a proven way of reserving and publishing availability.

Chapter 07

Prepare offers, prices and publication

Join the catalogue to specific selling accounts, meet each channel's requirements and put your pricing rules in order.

What you gain

You grow into further channels using a catalogue that is ready and pricing rules you can repeat.

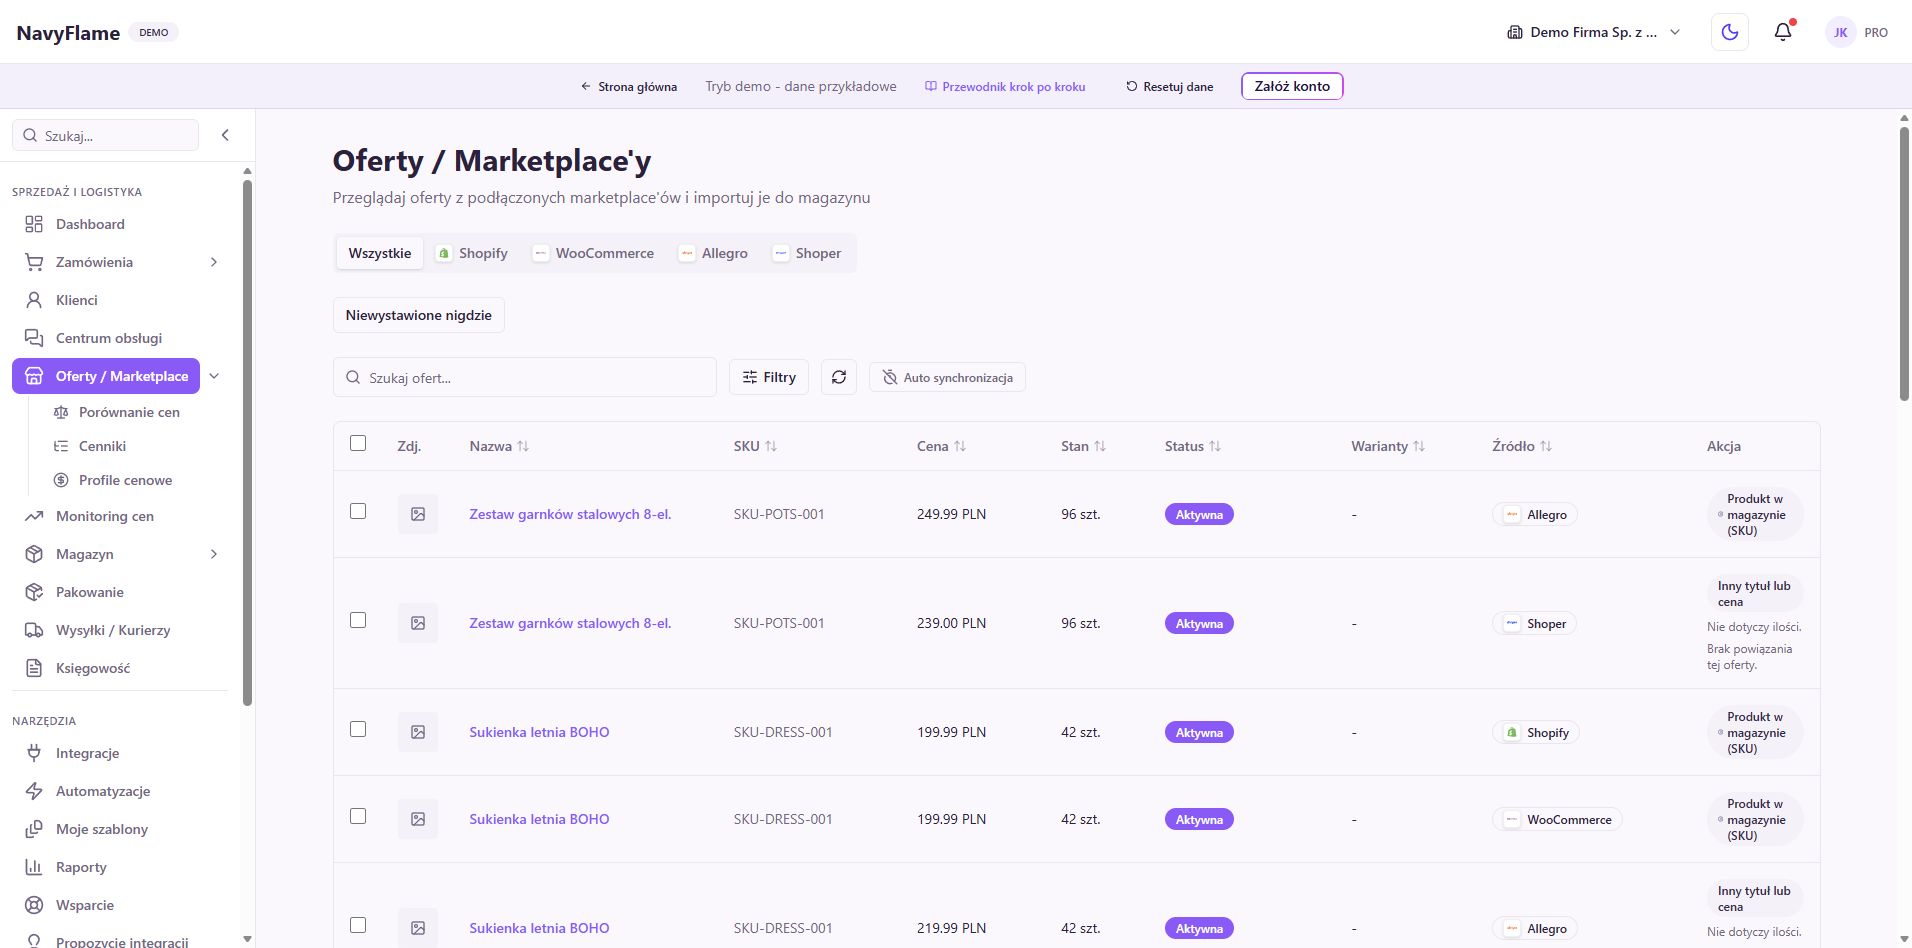
The list of sales channel offers in the NavyFlame demoThe list of sales channel offers in the NavyFlame demo
One correct publication first, then a larger batch built on the same proven rules. Click the image to enlarge. A screenshot of the public demo with sample data.

Step by step

  1. Review the existing offers

    Open Offers, choose the channel and account, then use the status and import filters. Compare the name, SKU, price and the link to Stock. Importing an existing offer into the catalogue and creating a new publication are different actions. Decide which one you want before selecting a larger batch.

  2. Complete the product before exporting

    In Stock, check the description, photographs, variant, unit, price and availability. Prepare the data the particular channel requires. A good card should make it unmistakable what the buyer receives, in what quantity and in which variant. A consistent product means fewer later corrections across many offers at once.

  3. Create a channel pricing profile

    Go to Channel pricing profiles in the Offers area. Create a profile for a platform, or for a specific account where different markets need different rules. Set the currency, how the exchange rate is determined, the group margin and the price ending, following the form. That profile is used when publishing and at the next synchronisation of the offer.

  4. Check the arithmetic on a single product

    Compare the base price, the target currency, the chosen rate and the final amount. Take your own cost of selling into account when deciding on a price. A margin or mark-up set in the form is not confirmation of real profit once commissions, delivery and the other costs of trading are counted.

    Check: You understand why the chosen product carries exactly that price on that particular selling account.

  5. List the first product through Export

    In Stock, select one prepared product and click Export. Choose the specific target account, especially where you have several accounts on the same platform. Set the number of units per offer if you use that option. Verify that you are publishing the right variant, in the right shop and the right currency.

  6. Fill in the fields the marketplace requires

    In the export form, choose the category and the required parameters. For Allegro, also check the manufacturer, responsible person and product safety information the form shows. Requirements depend on the category and the channel. Data that suits one product need not fit every item you selected.

  7. Confirm the result in the target channel

    After sending, check the publication result and open the offer on the shop or marketplace side. Compare the title, photographs, price, variant, quantity and category. A response saying the operation was accepted does not always mean the offer is already live for buyers; some channels run further validation or processing.

    Check: The offer is available in the expected state and the buyer's view matches the product you prepared.

  8. Only then widen the publishing

    Having checked a few products, move on to larger batches. In the Stock settings, prepare Category mapping, and under Auto-publication choose Enable auto-publication (drafts) and the channels supported. That feature prepares inactive offers for review. Check the price, category and content before you activate them for buyers in the channel.

Done when

What this chapter gives you

You have a verified offer in a specific channel and rules you understand well enough to apply to further products.

Chapter 08

Take an order from arrival to fulfilment

Build a legible work queue, check the buyer's details and use statuses that match how far handling has actually got.

What you gain

The team handles orders from one shared list, keeping track of the channel, the payment, the goods and the next step.

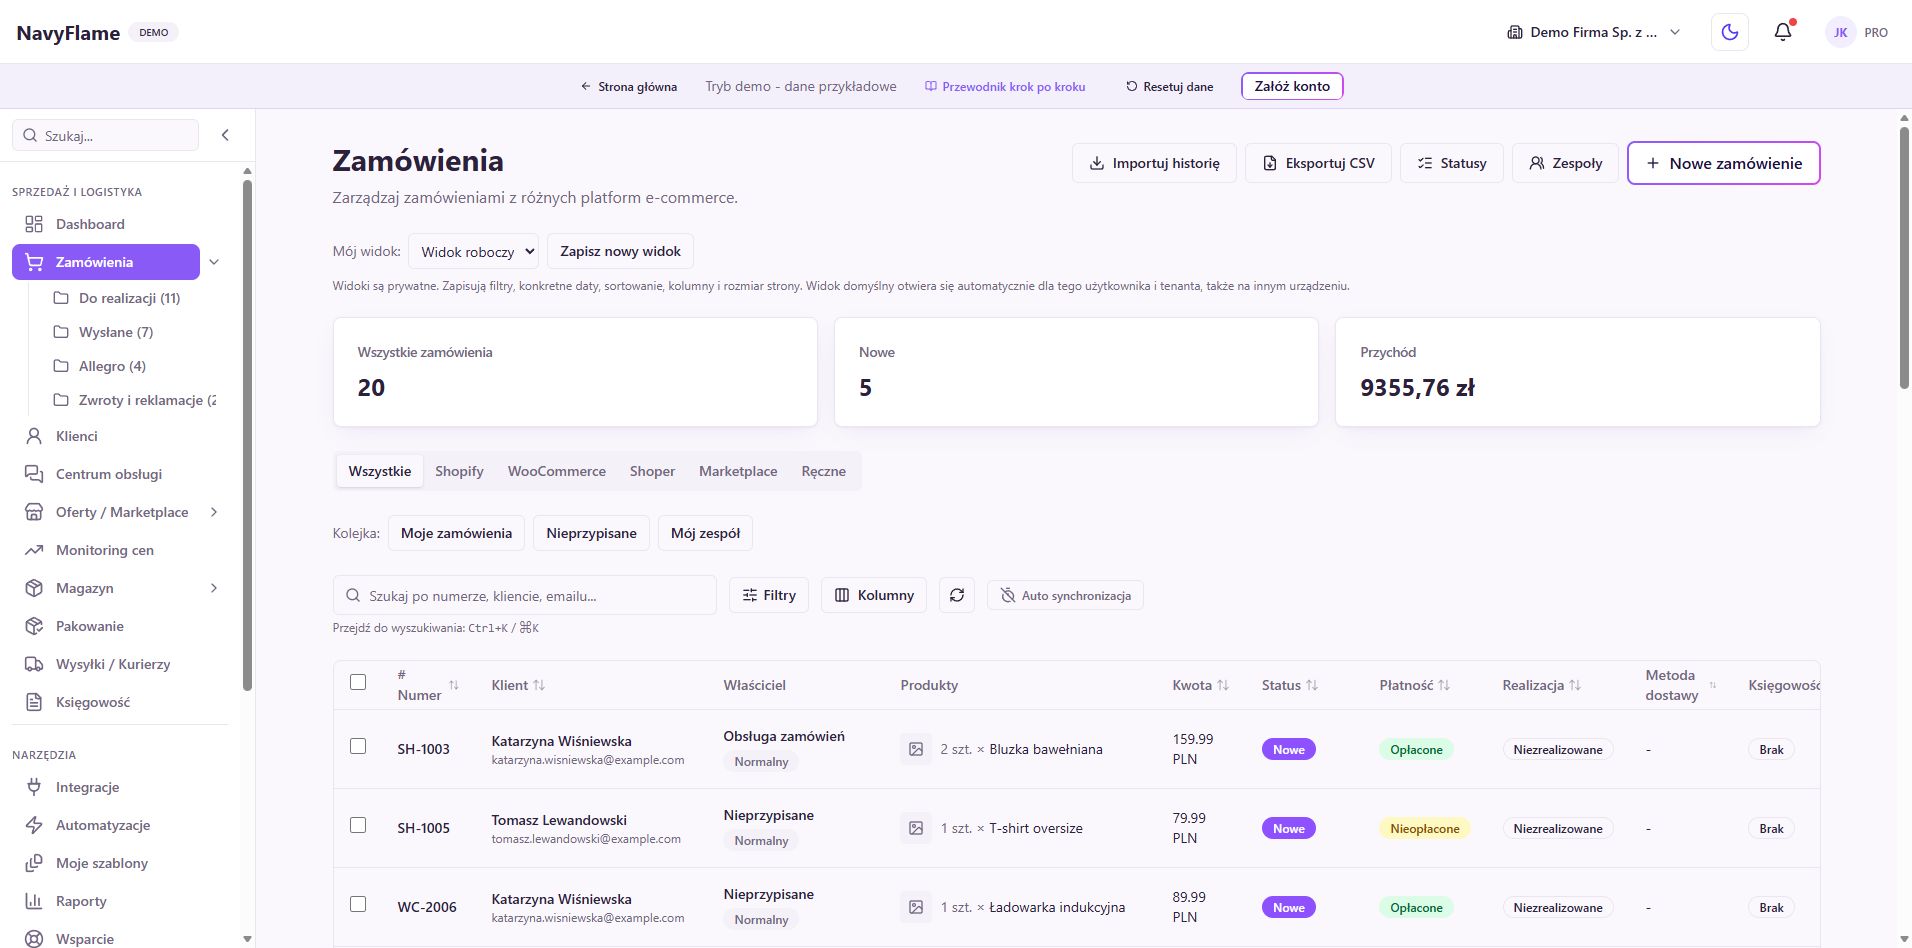
The order list with filters and statuses in the NavyFlame demoThe order list with filters and statuses in the NavyFlame demo
A queue view should match one task, for example checking details or preparing paid orders. Click the image to enlarge. A screenshot of the public demo with sample data.

Step by step

  1. Open the list and set the source

    Go to Orders and choose the channel or the specific account. If you handle several shops on the same platform, watch the source name next to each order. Search for a number you know, to confirm you are looking at the right shop's data. Check too that active filters are not hiding the items you expect.

  2. Shape the queue with filters

    Set the fulfilment status, the payment status, the date range and any other conditions you need. Prepare a view that matches one piece of work, for example orders paid and ready to prepare. Tell no results after filtering apart from an empty source. Do not change statuses merely to make orders disappear from the list.

  3. Adjust the columns and save a useful view

    Use the column picker and the views menu. Keep the data you decide on: number, source, payment, status, value and whatever matters for shipping. Save the set of filters if you keep coming back to the same queue. The view's name should describe the task, not the person who created it.

  4. Open the order details

    Click the order and compare the line items, variants, quantities, amounts and currency against the sales source. Treat the buyer's details, the invoicing details and the delivery address as separate pieces of information. The party named on the document and the recipient of the parcel may differ. Watch the pick-up point where the chosen delivery method needs one.

    Check: You know which goods to prepare, whom to issue the document to and where to send the parcel.

  5. Clear up the payment and any missing details

    Before going further, check the actual payment state, the method chosen and any notes from the customer. A missing confirmation on a cash-on-delivery order means something different from waiting for a transfer. Where details are missing, settle them through your own handling process and record what you need before issuing a document or a label.

  6. Put statuses and responsibility in order

    From the Orders list, go to your own statuses and the operational teams. Name the stages after what actually happens in the business, for example checking details or preparing. Before changing a status in use, check the automations that depend on it: moving to a given stage may set further actions off.

  7. Produce the document and prepare the shipment

    In the order details, check the documents section and the shipping actions available. Issuing an invoice, creating a label and packing are separate actions, described in later chapters. Read the result after each of them. That way the final status means the process really was carried out, not merely attempted.

  8. Change statuses deliberately, in bulk as well

    For a single order, choose the right next stage. For a bulk operation, select only orders meeting the same condition and use Change status. Read the summary, because some items may end in an error. If you need the shop updated too, check that separately in the channel concerned.

    Check: Status, document, shipment and the actions carried out agree; the exceptions stay visible for further handling.

Done when

What this chapter gives you

Orders have a legible queue, a complete set of checked details and statuses tied to what has actually been done.

Chapter 09

Connect the accounting and set up documents

Choose an accounting provider, check the numbering and prepare the rules for issuing documents against the right orders.

What you gain

Order data can feed a document in your accounting system, and you check the result and any problems while handling the sale.

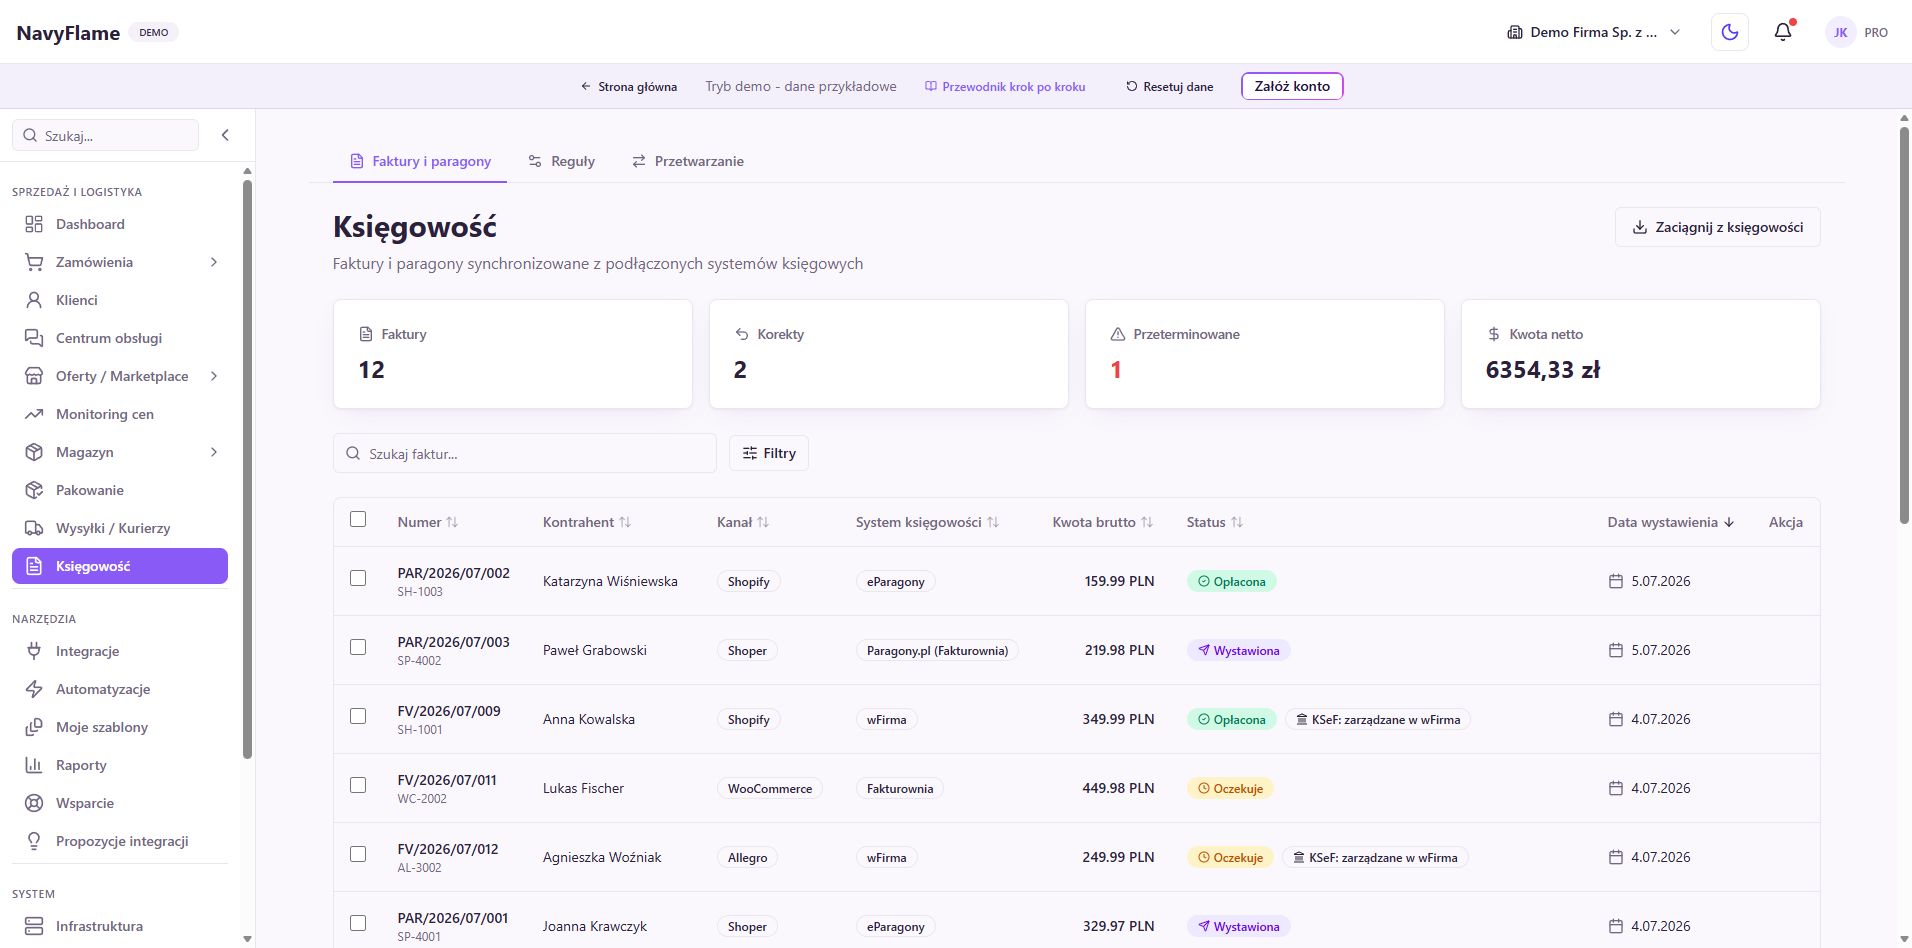
The list of accounting documents in the NavyFlame demoThe list of accounting documents in the NavyFlame demo
What confirms the process is a correct document at the provider and a matching result on the order. Click the image to enlarge. A screenshot of the public demo with sample data.

Step by step

  1. Connect the right accounting system

    In Integrations, choose the provider you use and follow their authorisation instructions. Test the connection. Verify that the connected company is the correct issuer of documents and has the right address, bank account and other settings. How you supply a key, an account name or permissions depends on the service chosen.

  2. Review the documents that already exist

    Open Accounting. If you have documents at the connected provider, use the accounting history import within the options available. You can pull in existing documents without setting up any automation for issuing new ones. Compare a sample of numbers and values with the accounting panel, particularly before switching from an earlier tool.

  3. Open Rules and choose the target

    In Accounting, go to Rules. Choose the right target system if your setup offers more than one. Note that the options available, the document types and the series fields change from provider to provider. Settings from one system should not be copied into another accounting system without checking.

  4. Decide who a document is created for

    In the When to issue documents section, set the invoicing mode: for every order, on request or B2B, or B2B only. Check how B2B is detected and the policy for choosing the document type. The choice should match the rules your accountant applies and the data the sales channels actually pass on.

  5. Set the moment of issue

    In Issue trigger, choose a manual action or the right automatic moment: after payment, after moving to Fulfilled, or after a label is generated. The invoicing mode decides which orders a document covers, and the trigger decides when it is created. To begin with, choose a path you can verify easily.

  6. Check the series and the continuity of numbering

    If the provider offers series, pick a real series from the list or fill in the text field as its description says. An empty value may mean the accounting system's default series. Some providers have no separate choice of series. Do not type the next invoice number into the series identifier field; check the counter in the system that issues the document.

    Check: You know which numbering the next document will use and whether it continues the right sequence in the accounts.

  7. Issue and verify the first real document

    Open a prepared order and, in the documents section, choose Issue invoice or the document type available for that purpose. Use an order for which a document genuinely should exist. Compare the number, date, buyer, line items, amounts, currency and the result in the accounting panel. Clicking alone does not confirm that it was issued.

  8. Only after checking, switch the repeatable process on

    Save the intended rules and make sure the automation required for the flow into accounting is in place. Check the next order that meets the conditions, and one that should not trigger a document. Use Processing and the document details to explain errors. With an ERP, also check the product links if your process requires them.

    Check: The document was created once, at the right provider, with correct numbering and data; an order not meeting the conditions did not trigger an unwanted operation.

Done when

What this chapter gives you

The accounting is connected, the numbering is checked, and documents are created under rules you chose deliberately and verified.

Chapter 10

Shipping, carriers and labels ready for work

Set up how you dispatch your commonest parcels. A sender entered once, the right service and printing configured shorten the handling of every order after that.

What you gain

Staff press a prepared dispatch button and the order data helps fill in the shipment. Less retyping means fewer chances to get an address wrong.

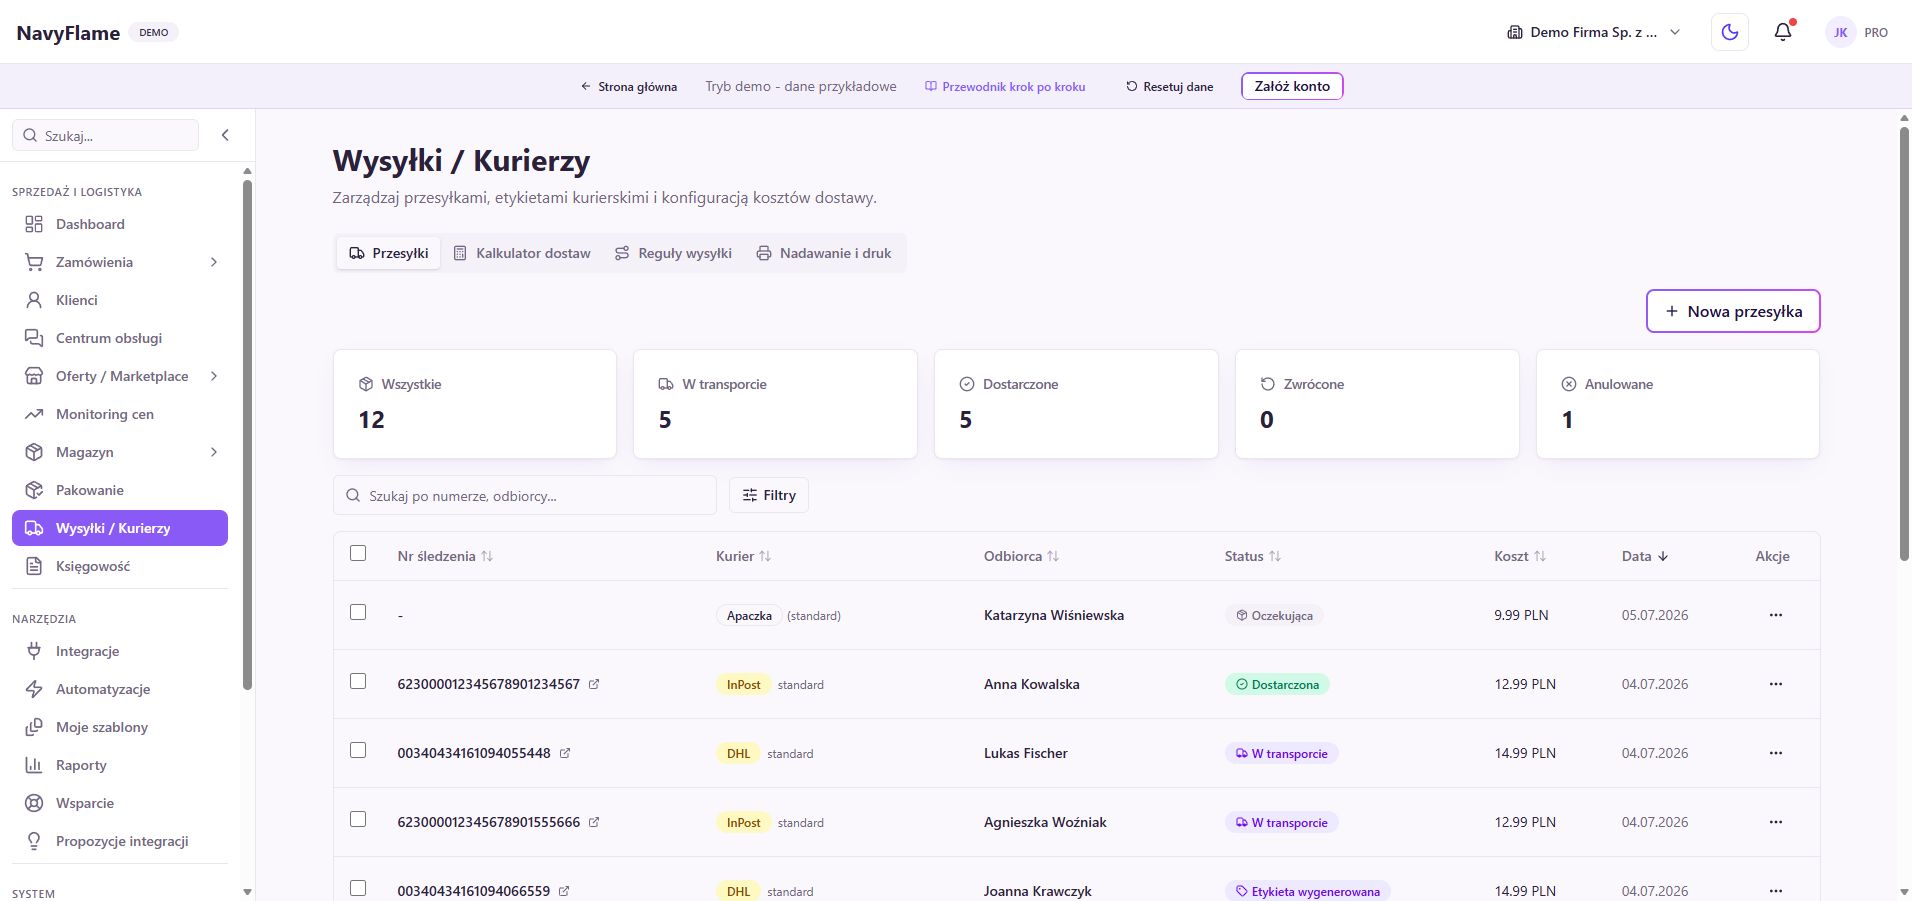
The NavyFlame shipment list in the demonstration environmentThe NavyFlame shipment list in the demonstration environment
The demonstration view: shipments, their statuses and the way through to dispatch configuration. Click the image to enlarge. A screenshot of the public demo with sample data.

Step by step

  1. Connect the carrier you use

    Open Integrations, add the right carrier connector and fill in the details its form asks for. Follow the instructions for that particular integration. Check that you are choosing the right sending account and environment before you create the first paid label.

    Check: The integration is active and the carrier appears when creating a shipment.

  2. Open Shipping / Carriers

    In the Shipments tab, get to know the list and the filtering. Click New shipment and work through the recipient, sender and parcel details. When you start from an order, compare the suggested details with the delivery method the customer chose.

  3. Check the service and the parcel parameters

    Choose the carrier and a service available on that account. Fill in the weight, dimensions, pick-up point or size class where they are required. Cash on delivery, insurance, cancellation and booking a collection depend on what the particular connector can do.

    Check: The recipient, the delivery method and the parameters match the actual parcel.

  4. Save your commonest case in Shipping rules

    Go to the Shipping rules tab. Set the button name, the carrier, the service, the sender and the default parcel parameters. Give it a legible name, for example "Locker, size B". Colour and order help staff recognise the variant at the bench.

  5. Decide when a label is ordered

    Under Dispatch and printing, check the Label ordering field. You can respect the template's setting, always order straight away, or only prepare drafts. To begin with, keep the confirmation step for bulk dispatch, so you can check the selected orders before buying labels.

  6. Match printing to your printer

    In the same tab, choose the Print layout: original for labels, or four labels on A4. For automatic printing, point at the browser or PrintNode. For PrintNode, connect the account, choose the printer and the number of copies. Save the settings.

    Check: A test label comes out the right size, with a legible code, on the printer you chose.

  7. Dispatch one real parcel

    Choose a ready order and the right template. Once the label is created, open the shipment and check the tracking number and the printout. Confirm the result on the carrier's side too, and that the number was passed to the sales channel if the connector supports that operation.

  8. Only then handle a batch

    Select a small group of similar orders and dispatch them together. On the shipment list you can select finished labels for printing. If one item reports an error, resolve it separately and check which shipments already exist.

  9. Use the calculator as pricing support

    In the Delivery calculator, set the Delivery options, Shipping zones and any product exceptions. Those settings help work out costs. The rates and delivery terms buyers see on a marketplace are configured separately in that channel.

Recipes you can use

A repeat parcel from a single button

Trigger
In the Shipping module you choose the quick dispatch template for an order.
Conditions
A verified carrier account, a correct address, a matching service and parcel parameters.
Action
The template fills in the sender and the parameters; the label setting decides between a draft and an order, and the print settings decide the printout.
Checking the result
Check one shipment first, its number and its label. Only then use the same variant for a batch.
Done when

What this chapter gives you

You have a verified path: order, shipment, label, printout and tracking. Further parcels can use the saved settings.

Chapter 11

The packing bench, step by step

Go from the list of waiting orders to a closed and dispatched parcel. You can use a scanner, a camera or manual confirmation of the contents.

What you gain

One bench walks staff through picking and dispatch. Whether the items and quantities match is visible before the parcel is sealed.

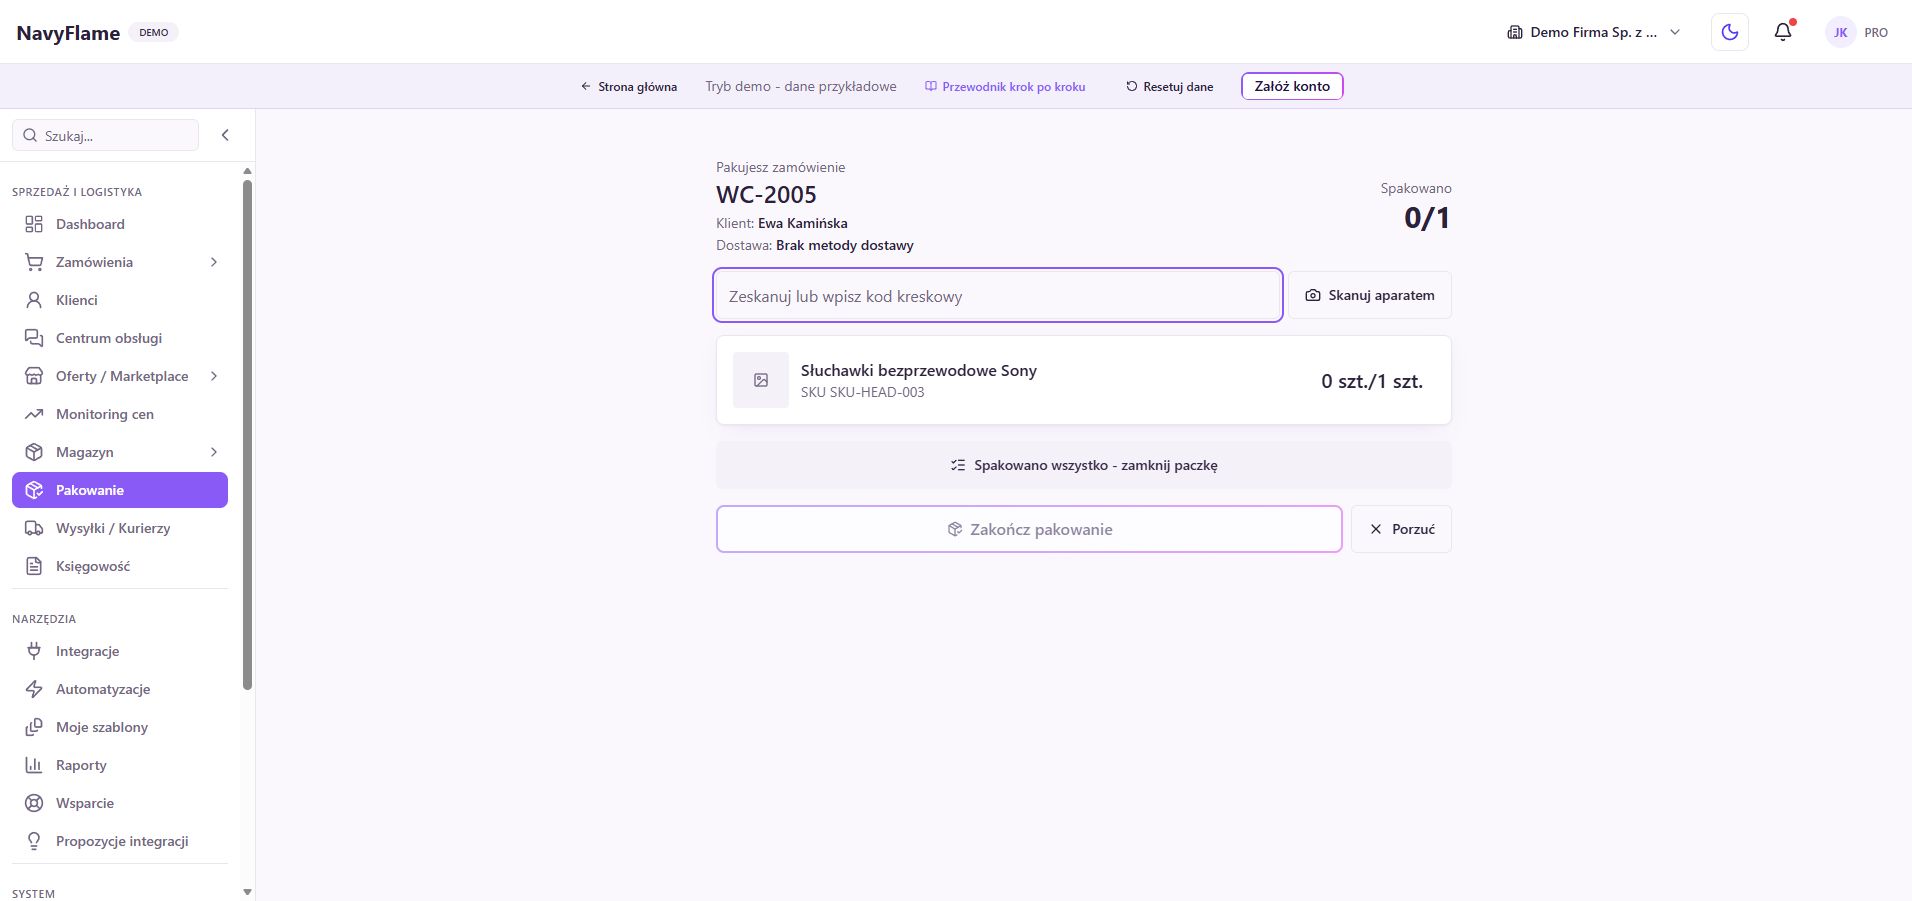
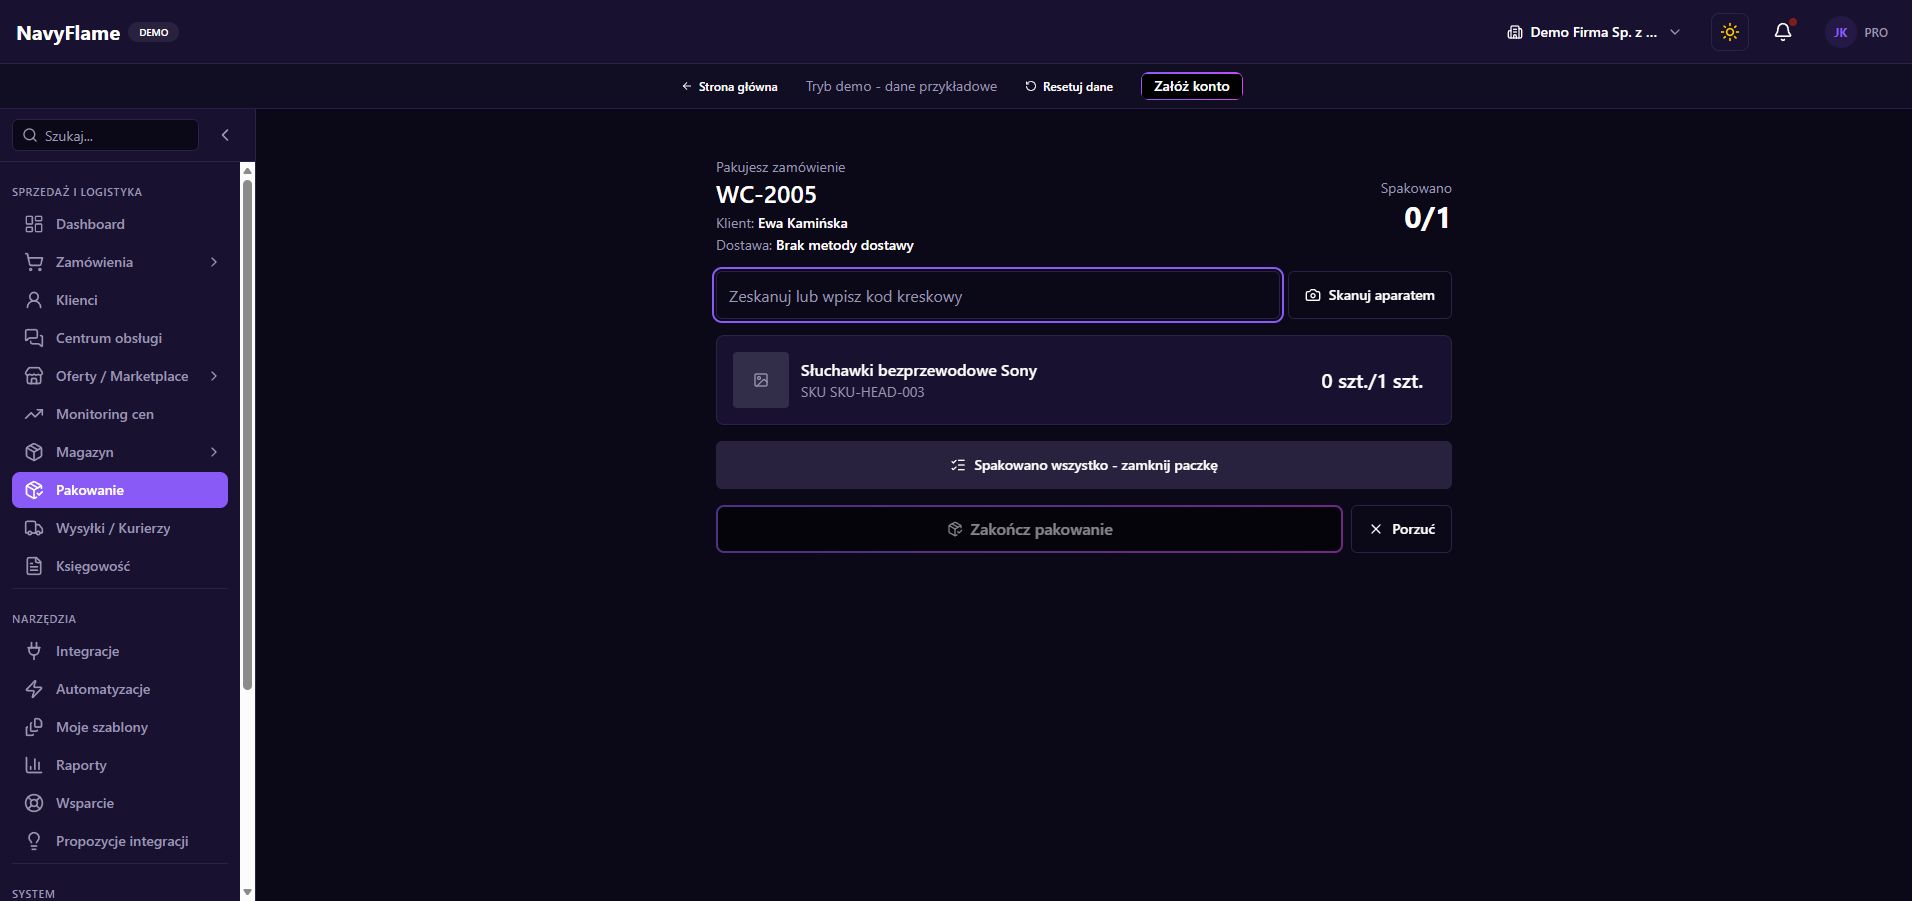
The NavyFlame packing bench with a sample orderThe NavyFlame packing bench with a sample order
The demonstration view: checking lines and quantities at the packing bench. Click the image to enlarge. A screenshot of the public demo with sample data.

Step by step

  1. Prepare the products and the table

    Make sure order lines are linked to warehouse products and carry correct codes. Have packaging, labels and the printer ready. A scanner that types the code like a keyboard should end the reading with Enter, so the code reaches the scanning field.

  2. Open Packing

    From an order detail, choose Pack to start its session. If a session is already open, check the order number and saved progress, then choose Resume session. The default queue shows paid, unfulfilled orders, oldest first. If you need a particular batch, select the orders on their own list and start packing that set.

    Check: The number on screen matches the order whose goods are on the table.

  3. Check the lines before scanning

    Compare the name, photograph, SKU and the quantity required. With variants, watch the size and the colour. The counters show progress for each line. Do not substitute a similar product without clearing it up against the order.

  4. Scan every piece you set aside

    Put the cursor in the Scan or type barcode field. Read the code with the scanner, or type it and press Enter. You can also click Scan with camera and grant the browser access to it.

    Check: The right line's counter goes up. A message about a code that does not match needs clearing up before you go on.

  5. Handle an exception deliberately

    A line with no warehouse link may need the Confirm button. Look at the product and count the quantity before confirming it by hand. If a reading was wrong, use the undo on that line. Then fix the missing product link before the next orders.

  6. Without a scanner, confirm the physical set

    If you pack by hand, count every line and click "Everything packed, close the parcel". That is the packer's confirmation and the move to dispatch. Use it only after really checking the contents, not as a way past missing products.

  7. Finish a complete session

    When scanning, bring every line up to the quantity required and click Finish packing. If you are stopping because of an error, consider Abandon. On returning, the saved progress is still there, but resuming requires deliberate confirmation.

  8. Work through Dispatch parcel

    Once picking is finished, choose the prepared shipping template. Check whether its settings order a label or create a draft. Take the printout and stick it on the right parcel. Closing the packing session does not by itself mean the parcel was dispatched successfully.

    Check: The parcel carries a label matching the order, and the dispatch result is confirmed under Shipping.

  9. Set the rhythm of the bench

    The option Open the next parcel after dispatch speeds up batch work. When entering from an order detail, you can instead enable Return to the order after packing. Both preferences are remembered in the bench's browser. For a chosen batch, the panel keeps the queue of selected orders.

Done when

What this chapter gives you

Whoever packs can pick, check and dispatch a parcel, and recognise the situations that need a human decision.

Chapter 12

Automations that put the team's work in order

Turn repeated decisions about folders, statuses and comments into legible rules. Start small, check what matches, and only then publish the rule.

What you gain

The team can see why an order reached them and what has already been done. The run history helps judge the result of every rule.

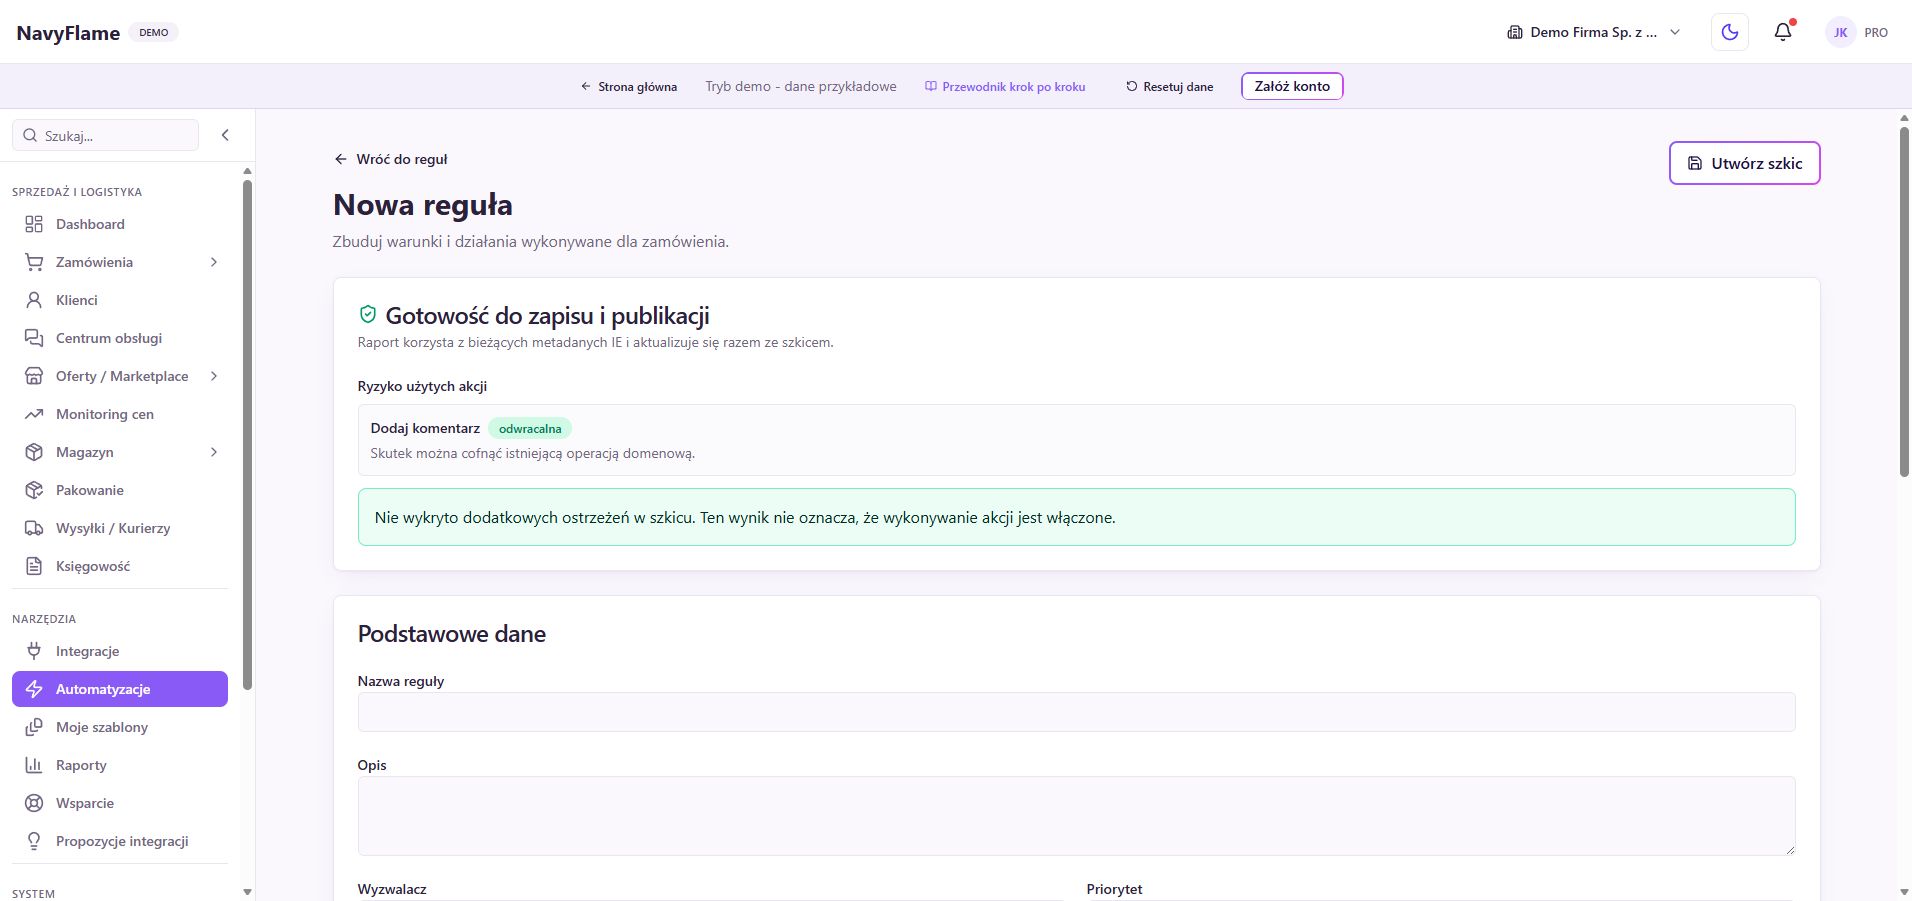
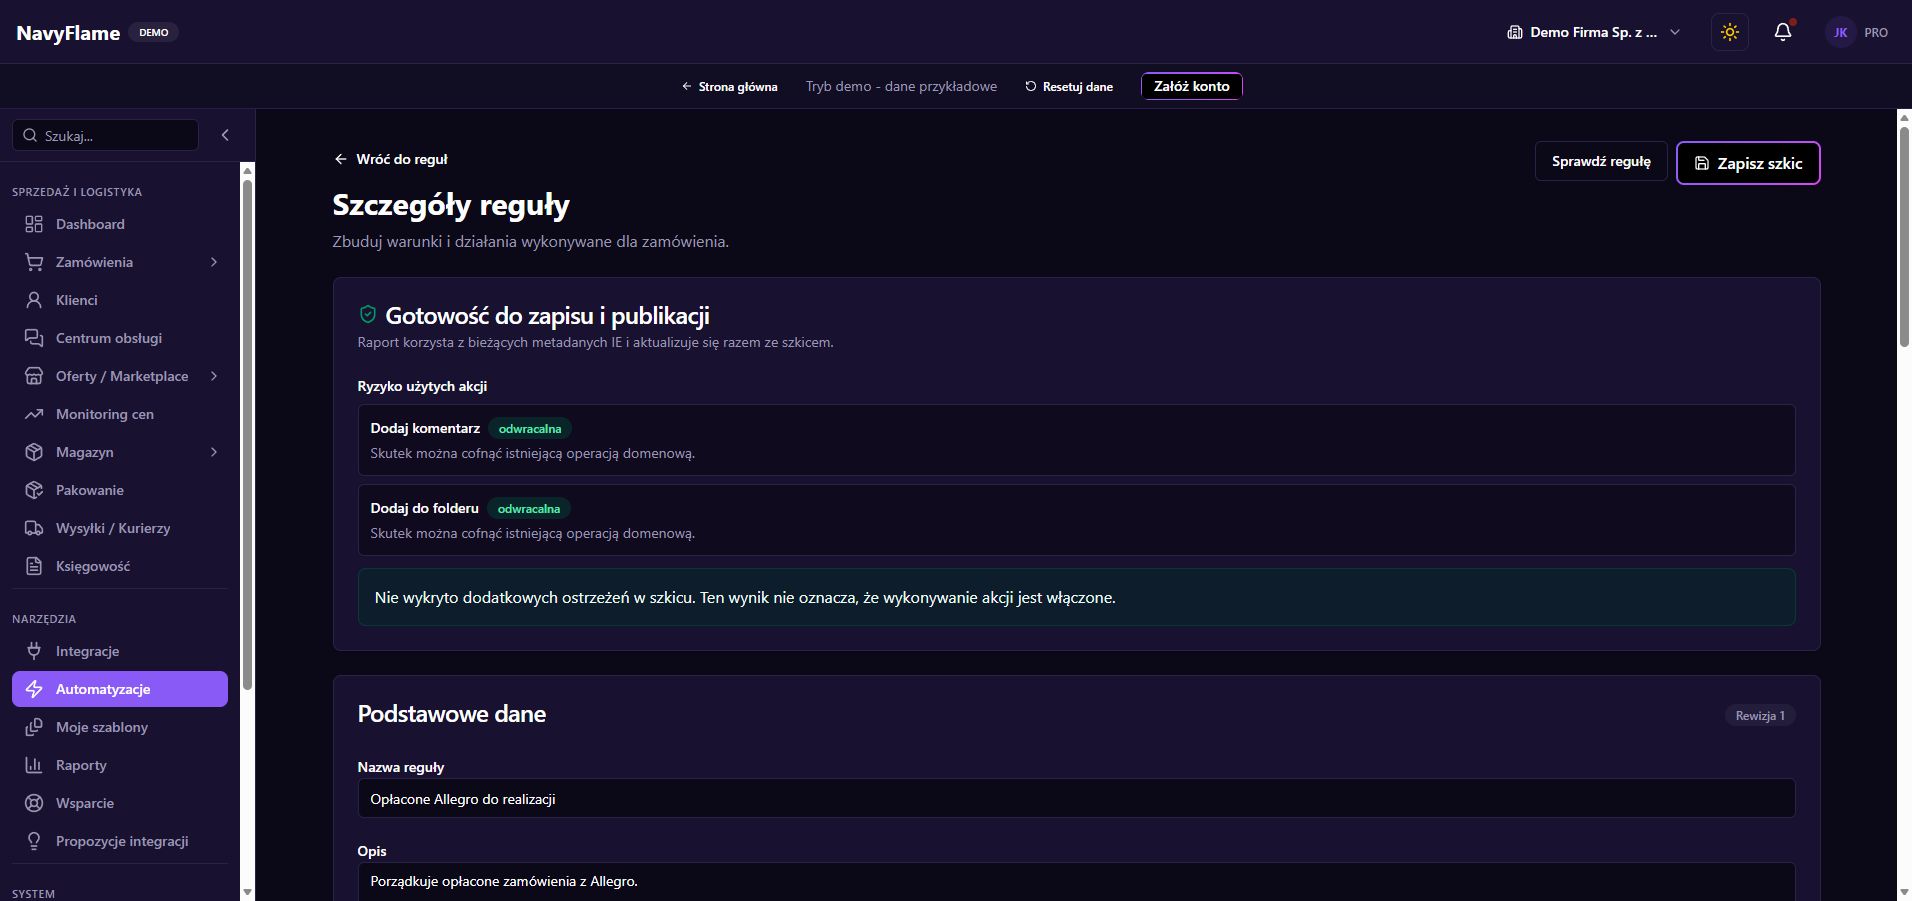
The NavyFlame rule builder with a trigger, conditions and actionsThe NavyFlame rule builder with a trigger, conditions and actions
The builder in the demo uses sample data. Publishing on a real account needs your own check of the process. Click the image to enlarge. A screenshot of the public demo with sample data.

Step by step

  1. Choose the right tab

    Go to Automations and Rules. This builder handles order events, conditions and tidying actions. Data flows, e-mail notifications and shipping configuration have their own tabs and forms. Which module you use depends on the effect you want.

  2. Create a draft with a clear name

    Open a new rule. Enter a name describing the result, for example "Paid Allegro to fulfilment", and a short description. In Trigger, choose the event, for example Order paid. The trigger sets the moment of evaluation, and the conditions narrow which orders match.

  3. Add conditions based on your own data

    Choose a field, an operator and a value. You can use the source, payment, status, SKU, country and folders, among others. A group of all conditions needs every one met; a group of any is satisfied when one matches. Start with a simple set.

  4. Check units and missing values

    The gross value is expressed in the smallest unit of the currency: for PLN, 100000 means 1000 PLN. Always add a currency condition when comparing an amount. Weight is in grams. Fields belonging to a later stage of the order may be unavailable for a given trigger.

  5. Choose from the actions available

    Add a comment, add or remove a folder, set the order status, or create an internal notification. Choose folders and statuses from the lists. Actions run from the top down; you can change their order. Set an optional delay only where it serves a concrete purpose.

  6. Settle how it works with other rules

    Check Priority and the After a match field. Decide whether the system should carry on checking further rules or stop. With several rules changing the same status, describe the order and the expected result before switching them on.

    Check: No later rule accidentally overwrites the result of an earlier one.

  7. Save and run a test with no effects

    Click Create draft or Save draft, then Check rule. Choose the saved draft and one order, or the most recent orders, up to 20. Click Run test with no effects. Look at how the conditions matched and the actions planned; the test carries out no business operation.

    Check: A positive example matches, and an order outside the scope does not.

  8. Publish the saved revision

    Once you have checked the results, open publication and read its summary. Publish the specific saved draft. Editing a draft again does not automatically replace the active version. Check the active marking and the version indicated before leaving a rule unattended.

  9. Check a real run

    Open Automation runs and find the event for the order. Look through the result of the conditions and each action, then the order itself. If behaviour surprises you, use Pause. The version history lets you restore an earlier configuration as a new version.

Recipes you can use

Paid orders to fulfilment

Trigger
Order paid.
Conditions
The order source matches the chosen channel, for example allegro.
Action
Add the comment "Payment confirmed. Prepare the order" and add it to the existing To fulfil folder.
Checking the result
Test a paid order from that channel and an order from another source. After publishing, check the folder and the comment.

A larger value needs an extra check

Trigger
Order created.
Conditions
Currency equals PLN and gross value at least 100000, that is 1000 PLN. Set the threshold to suit your own business.
Action
Add to the Check folder and create an internal notification with instructions to verify the delivery details.
Checking the result
Check orders below and above the threshold, and another currency. The rule itself does not stop dispatch if the team or other settings start it.

Packing instructions for a given SKU

Trigger
Order created.
Conditions
The line SKUs contain the exact code of a product needing extra protection.
Action
Add the comment "Protect the product with an extra layer and check the packaging" and the Careful packing folder.
Checking the result
In the test, use an order containing that SKU and a similar variant with a different code. Confirm the comment is visible to whoever fulfils it.
Done when

What this chapter gives you

You have a published rule, the result of a real run, and you know how to pause it and recover an earlier version.

Chapter 13

Messages and e-mails that help the customer

Compose consistent confirmations, shipping notices and messages carrying documents. Handle replies from sales channels in the Service centre, within what the connected channel allows.

What you gain

The customer gets legible information about their order, and the team follows one shared process instead of writing from scratch every time.

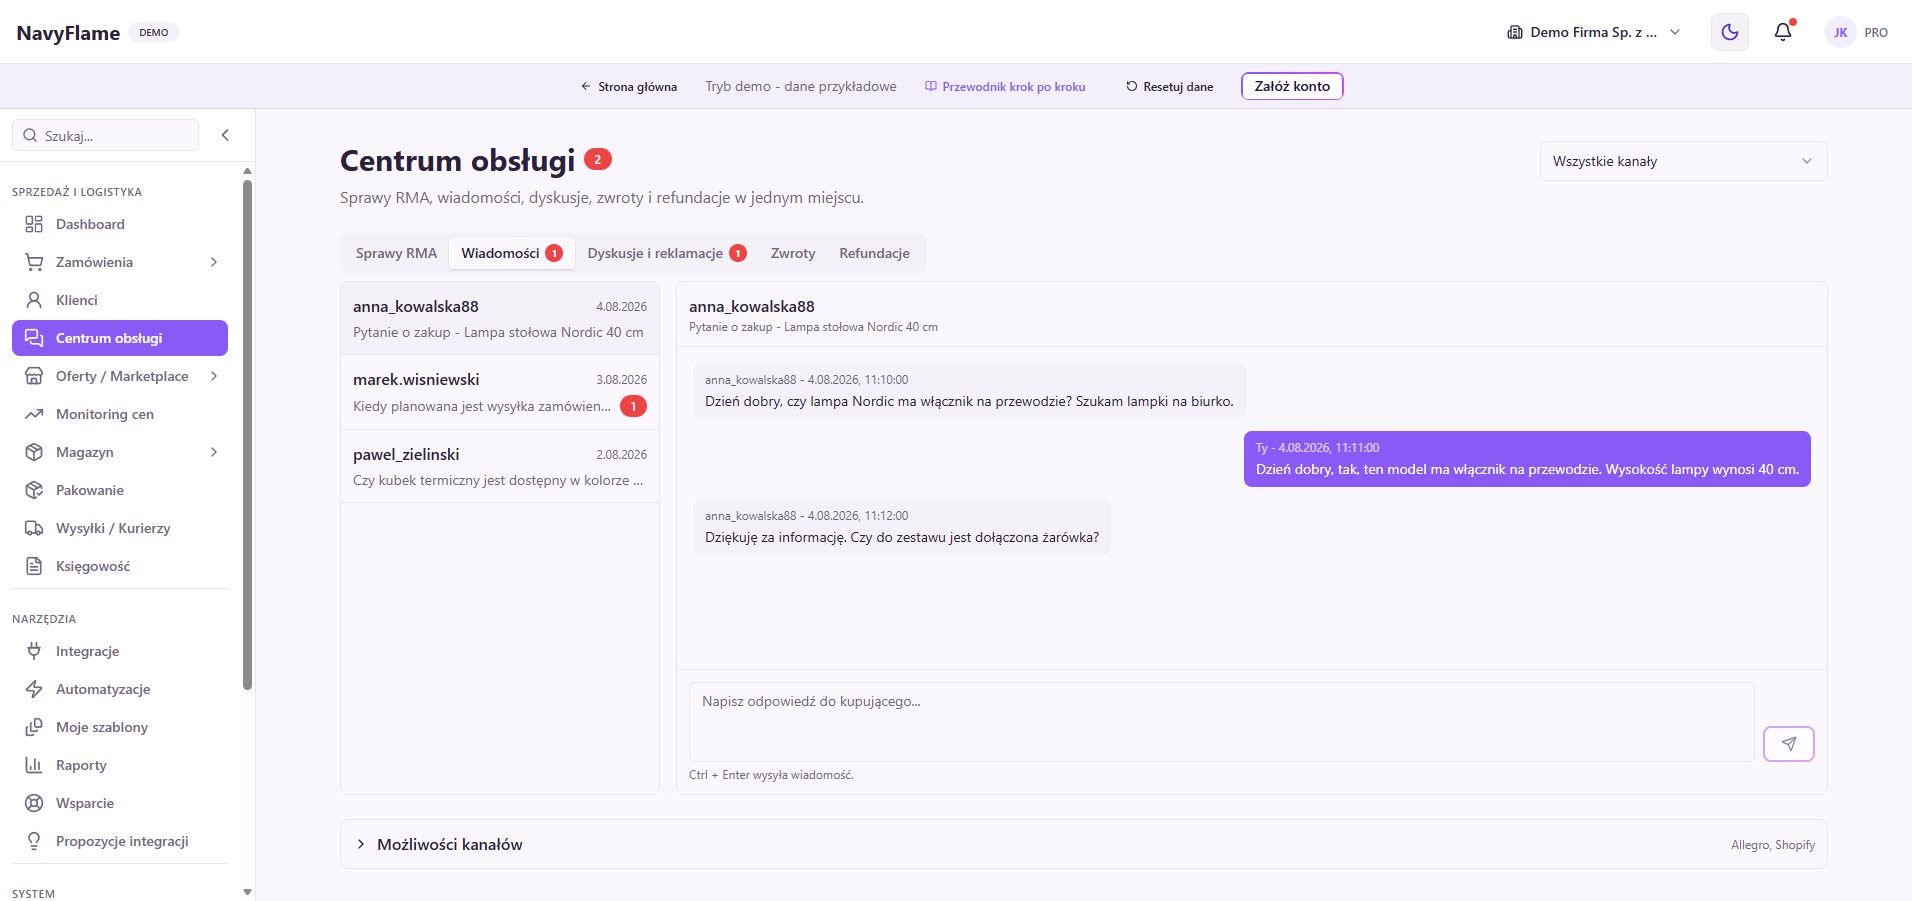
The NavyFlame Service centre with sample conversationsThe NavyFlame Service centre with sample conversations
Sample data in the Service centre. Which actions are available depends on what the channel can do. Click the image to enlarge. A screenshot of the public demo with sample data.

Step by step

  1. Keep replies and automatic e-mail apart

    In the Service centre, open Messages to work with conversations handled by a connector. Configure automatic e-mails tied to order events under Automations, E-mail notifications. That way you know where to find a thread and where to find the sending settings.

  2. Prepare the sending account

    Connect an e-mail service following its form and instructions. The automation offers a choice of Resend, SendGrid, Mailgun or SMTP. Enter a company sender address and a Reply-To that you genuinely read. The sender name should be recognisable to the buyer.

  3. Build the first template

    Open Templates and create one. In the builder, choose the message type, an internal name, the subject and the body. Use a suitable example, such as a shipping notice. The preview helps check the layout, the text size and the content of variables before use.

  4. Write the message around the customer's need

    Give the order context in the subject. In the body, explain what happened, what comes next and how to get in touch. Do not type a fixed tracking number into a general template. Use the variables provided and check their result on sample data.

  5. Add an e-mail automation

    In E-mail notifications, create an automation. Choose the trigger, for example After an order is paid or After an order ships, a delay, the template, the mail provider and the sender. As recipient, choose the customer's e-mail from the order, or your own address for a controlled check.

  6. Set up the message carrying a document

    With the trigger After an invoice is issued, PDF settings appear. Choose whether to attach the file and what to do if fetching it fails. PDF availability depends on the accounting system; online fiscal registers need not provide such a file.

    Check: The wording does not promise an attachment in a variant that may send the message without one.

  7. Match the language and the exceptions

    Set the default language and any rules by country or document type. Rules can choose a different template or skip sending. The language of document names does not translate the template's body: for an English message, prepare genuinely English text.

  8. Verify delivery

    Run a controlled pass with yourself as recipient and an event matching the automation. Open the e-mail logs, check the address, the state, the body and the attachment, then your inbox. Once it works, set the intended recipient and check the first ordinary send.

  9. Reply with the full context

    In the Service centre, choose the channel and the conversation. Read the history, check the order and the team's earlier replies. If sending is available, type your reply and send it once. Confirm it appears in the thread; where the connector is limited, use that channel's own panel.

Recipes you can use

The sales document in a message to the buyer

Trigger
In the e-mail automation, choose After an invoice is issued.
Conditions
A linked template and a working mail provider; the document was created in a system that supplies a supported PDF.
Action
Send the message to the customer from the order, attach the PDF and apply the chosen policy for a failed fetch.
Checking the result
Check the log and a test inbox, the right document, the order number and the language. Make sure the accounting system is not sending an identical second message.
Done when

What this chapter gives you

You have a consistent template, a verified delivery path and a clear split between automatic notifications and service replies.

Chapter 14

Returns, complaints and calm case handling

Bring the conversation, the decision and the physical return of goods into one orderly path. Keep handling the case, refunding the money and taking the product back into stock separate.

What you gain

Whoever picks up a case knows who owns it and what has happened. The warehouse only increases stock by goods that genuinely came back.

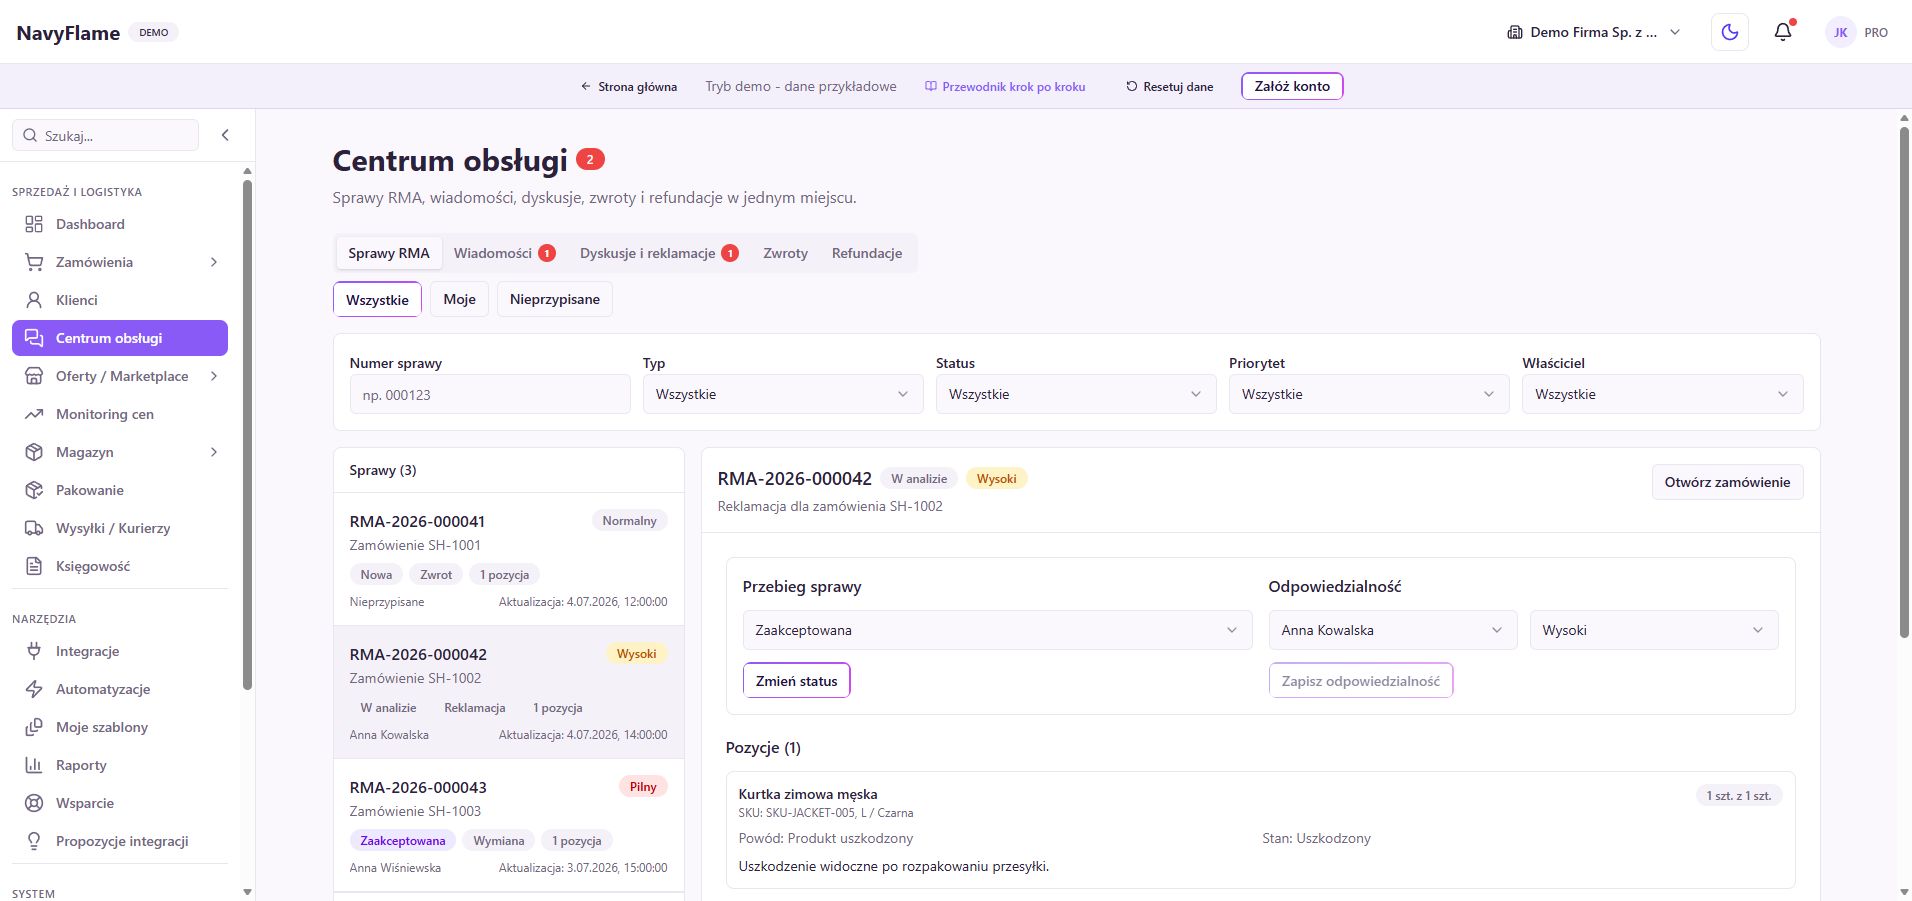
A sample RMA complaint in NavyFlame: owner, priority, line items and historyA sample RMA complaint in NavyFlame: owner, priority, line items and history
One case brings together responsibility for handling, the related order and the history of changes. Click the image to enlarge. A screenshot of the public demo with sample data.

Step by step

  1. Check what the connected channel supports

    Open the Service centre and choose the right channel. The tabs cover RMA cases, Messages, Disputes and complaints, Returns and Refunds. What data you see and whether you can change it depends on the connector. Read the note about the actions available for that channel.

  2. Find the order and the full history

    Open the case and compare the customer, the channel and the order. Read the recent messages and what was agreed earlier. Establish whether the customer is returning a product, reporting a fault, asking about a parcel, or waiting for a decision already agreed to be carried out.

    Check: You are handling the right case and know where it currently stands.

  3. Use RMA for internal organisation

    In RMA cases, open the record and, in the Responsibility section, choose the owner and the priority. Click Save responsibility. In Case progress, choose the next status available and use Change status. Check the line items and the change history, which is saved automatically.

  4. Send a substantive reply

    In the relevant conversation or dispute, describe the next agreed step. Say what information is missing to resolve the case, and do not repeat questions the customer has already answered. Where a channel is read-only, reply in its own panel and keep the handling context consistent.

  5. Take the decision along an available path

    For a return, use Accept return or Reject return where those buttons are available for that channel and state. Fill in the reasoning required. For a complaint, use the resolution methods offered. Base the decision on your own procedure and this particular case.

  6. Receive the physical goods

    When the parcel comes back, check the product, the variant, the quantity and the condition of the packaging. Compare the contents with the case. Damaged or incomplete goods should not return to available stock automatically. Settle how they are handled in line with how your warehouse works.

  7. Take the confirmed lines into stock

    In the return details, click Take into stock. Choose the location, search for the goods by name or SKU, enter the quantities actually received and confirm. The form requires you to name the products; a return being reported does not confirm what was in the parcel.

    Check: It shows Taken into stock, and the level of the right products went up in the chosen location.

  8. Check the settlement separately

    Under Refunds, check the state of the financial operation for a channel that offers one. Accepting a return and taking it into stock are no proof that money was paid out. Once the agreed settlement is done, verify the result in the channel or the system that handles the payment.

  9. Close the case with a legible result

    Set the final status available and check the RMA history. Confirm that the customer got a reply, the goods reached the right place and the settlement has a known result. When handing over between departments, say who carries out the next step.

Done when

What this chapter gives you

Every case has an owner, documented decisions and separate results for customer service, the warehouse and the settlement.

Chapter 15

Wholesalers, deliveries and checking real stock

Connect your supply sources and make sure the stock level matches what you actually hold. Receiving a delivery and stocktaking serve different operations.

What you gain

Legible SKUs, locations and quantities are the basis of confident packing and of publishing availability in the channels you support.

The NavyFlame warehouse with sample products and stock levelsThe NavyFlame warehouse with sample products and stock levels
Demonstration data: the warehouse and the product links are the basis of all further operational work. Click the image to enlarge. A screenshot of the public demo with sample data.

Step by step

  1. Open Wholesalers

    Check the list of existing connections before adding another. If a source is already configured, go into editing it. For a new one, choose to add a wholesaler and the right connector available. Name the connection so the supplier and the account in use can be told apart.

  2. Establish what the supplier provides

    Read the form and the source's instructions. Fill in the address, file or access details required. The scope of catalogue, stock and prices depends on the connector and on the supplier's data. Do not assume every wholesaler connection also allows purchase orders.

  3. Check a sample of the imported products

    Compare the name, SKU, EAN, unit, price and availability of a few items with the supplier's data. Check the variants and how they link to your own warehouse. Only after that check should you extend publishing or synchronisation to a larger catalogue.

    Check: The same goods carry the right link, without creating needless duplicates.

  4. Prepare the warehouse locations

    In Stock, Locations, define the places your business uses. The names should be unambiguous to staff. Open a sample product card and check how stock is assigned. The location chosen on a document decides where a change in quantity lands.

  5. Start receiving a delivery

    Go to Stock, Goods receipt. In Document settings, choose the location and type a legible reference to the delivery. Click Start receipt. Have the quantity actually received ready, not merely the number from the supplier's advice note.

  6. Enter the items received

    Scan or type the product code and the quantity, using Enter or adding by hand. A camera scanner is available too. Compare the product recognised with the physical goods, and remove a wrong line before confirming. Watch fractional units if you use them.

  7. Confirm the receipt and check the result

    Having checked the lines, click Confirm receipt. The operation adds the received quantities to the stock at the chosen location. Look at the summary, then the level of at least one product. Clear up an empty document, or one against the wrong location, before the next delivery.

    Check: The level rose by the quantity received, rather than being replaced by the delivery quantity.

  8. Count the stock through Stocktaking

    In Stock, Stocktaking, choose the location and a name for the count. Start the document, enter the products and the counted quantity. See the differences against the system level. While counting, limit parallel movements of the same items, so the result has one clear point of reference.

  9. Confirm the counted quantities

    Click Confirm stocktake once you have checked the differences. For the items covered, the location's level is set to the counted values. Check the product card and the result of any further availability synchronisation where it is configured. Investigate the cause of larger discrepancies.

Done when

What this chapter gives you

The supply source is recognised, products have verified links, and staff can tell a receipt from a correction by counting.

Chapter 16

Reports and prices under your control

Check sales, products and how operations ran. Price monitoring helps find discrepancies and prepare recommendations that you approve after your own judgement.

What you gain

It is easier to spot products needing attention and to weigh sales against costs. You have arguments for decisions on price and on how work is organised.

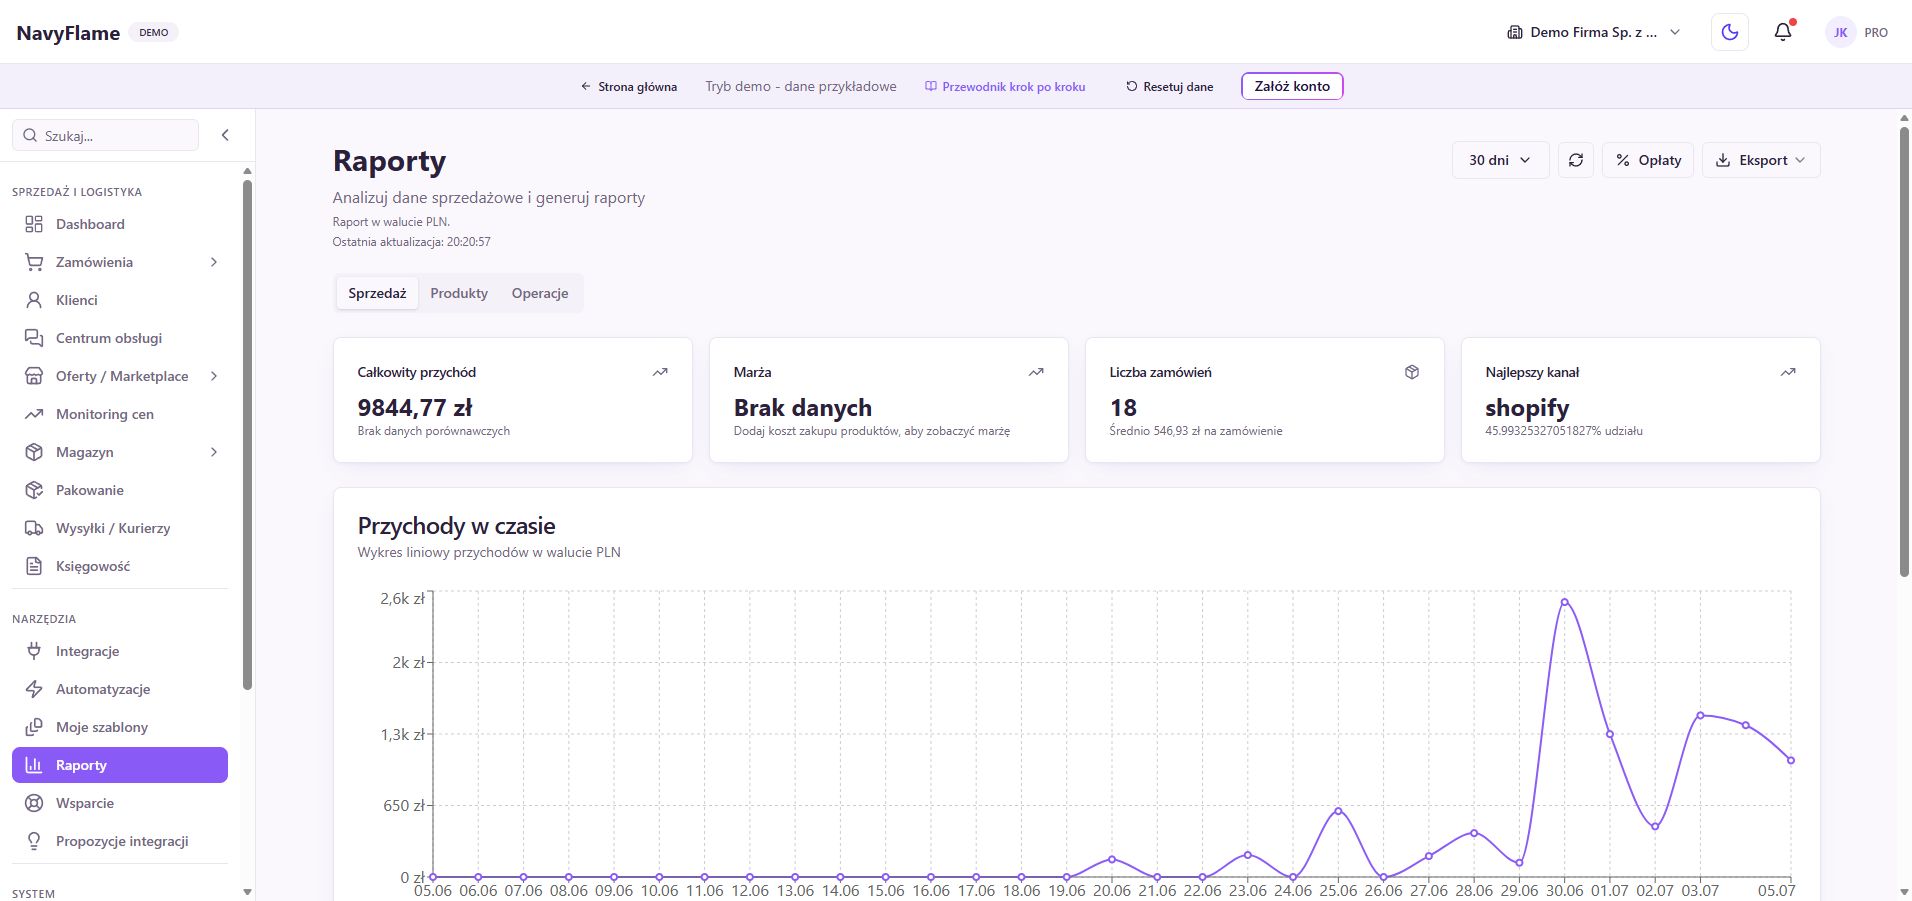
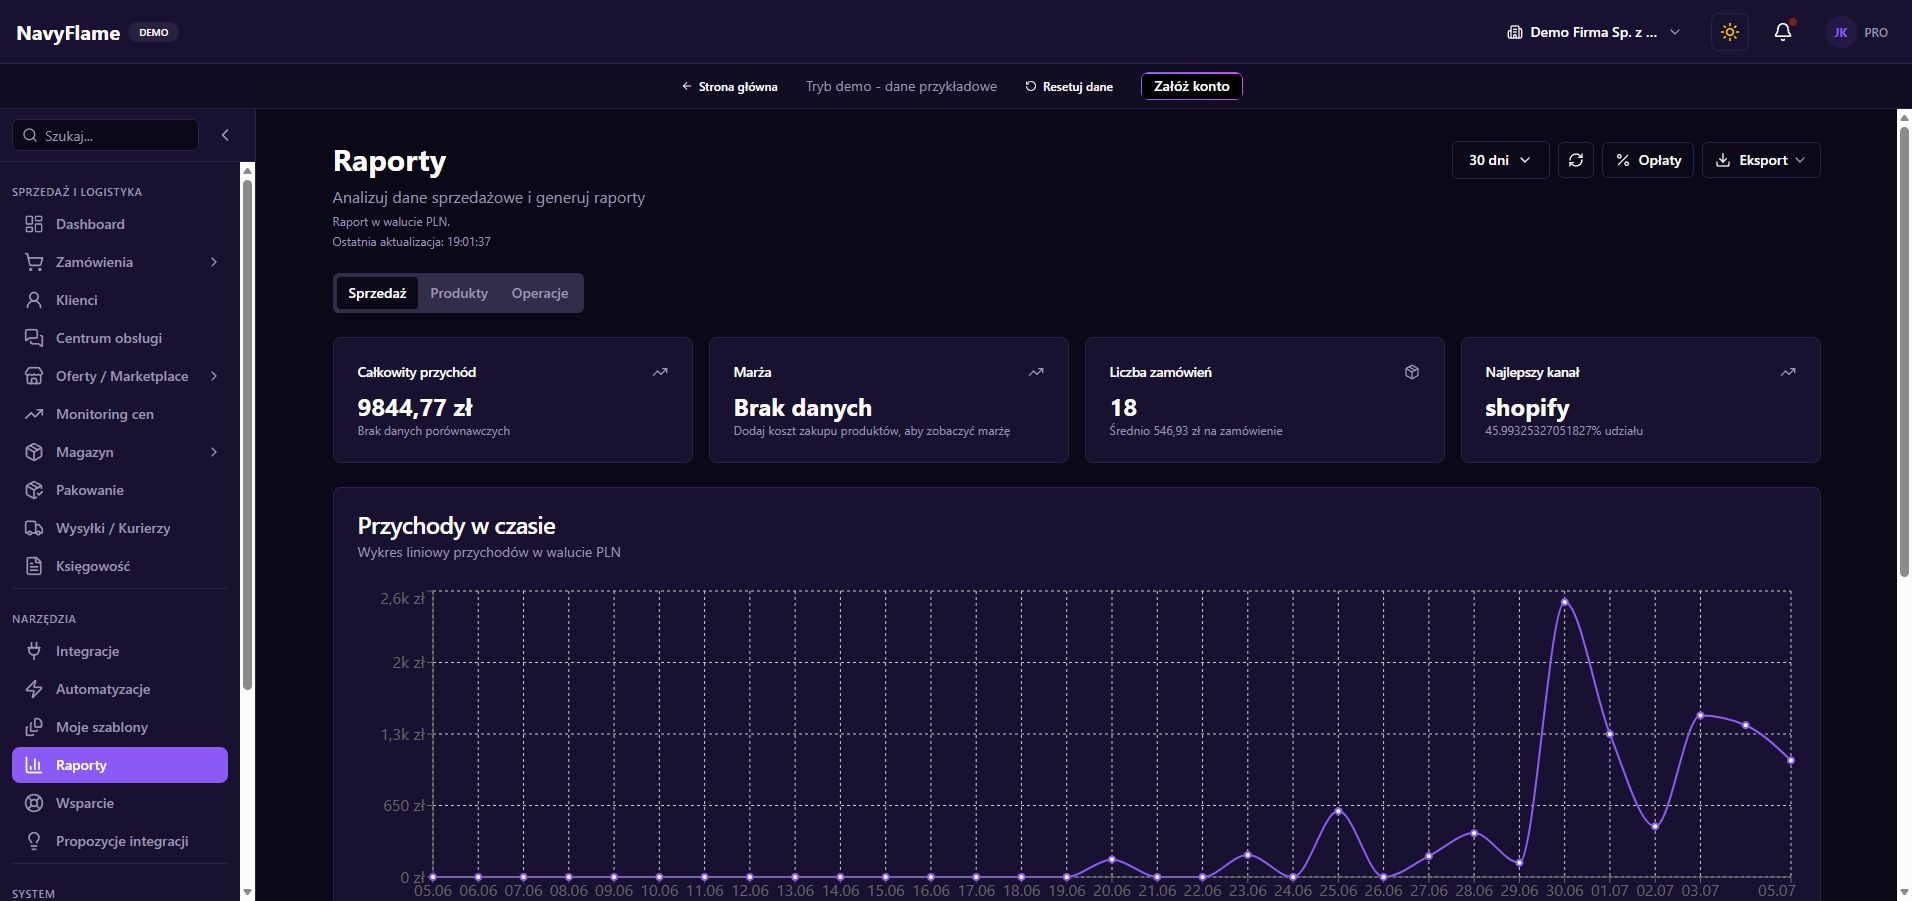
NavyFlame reports with demonstration sales resultsNavyFlame reports with demonstration sales results
The demonstration report shows how the analysis is laid out. The numbers in the demo are not a real shop's results. Click the image to enlarge. A screenshot of the public demo with sample data.

Step by step

  1. Open Reports and choose the period

    Start with a range covering real data from after the channels were connected. The shortcuts include 7, 30 and 90 days among others. Check the active filters and the currency. Analyse revenue in different currencies separately, following the report's own labels.

  2. Look through Sales

    Compare the number of orders, the values and the distribution of sales the report shows. If a result surprises you, open representative orders from the period examined. Check their dates and statuses. Where the data import began may limit how meaningful a comparison with an earlier month is.

  3. Move on to Products and Operations

    In the Products tab, look for the range that matters to the result. Under Operations, watch fulfilment and the places that could be improved. Write down one concrete conclusion, for example checking an item or changing a process, and who will act on it.

  4. Verify the cost data

    Check product costs and the marketplace fee settings available alongside the reports. Without a correct cost, a margin figure may be incomplete. Compare a few items with your own data, bearing in mind which elements of cost a given view actually counts.

    Check: You judge margin on data you have checked, and do not equate it automatically with the firm's full profit.

  5. Open Price monitoring

    Look through the items marked Below cost, Low margin, Divergence from the offer or Price spread between channels. Check the particular offer, its currency and the linked warehouse product. Fix wrong links or costs first.

  6. Create a narrow pricing rule

    In Rules, add a name and a scope, for example selected SKUs. Choose an available strategy: target margin, margin floor, price from stock, mark-up, fixed price or a price list. Fill in the values required, the price limits and how rounding works.

  7. Switch on the preparation of recommendations

    In the repricing settings, set the frequency, the low margin threshold and the price spread threshold. Tick notification about recommendations if that is useful. Save the settings, then use Run now for a first controlled evaluation.

  8. Judge and approve the suggestions

    Under Suggestions, compare the current and proposed price, the reasoning and the margin. Approve the changes you deliberately choose, or reject those that miss the mark. Repricing prepares recommendations; it does not change prices by itself without approval. Verify the result of pushing a change to the channel.

    Check: The new price matches the decision, and any publication error has been recognised.

  9. Return to History and to the result

    Check the history of pricing decisions and, after a suitable period, come back to the reports. Compare sales and margin over a similar range. Do not draw a conclusion from one order alone, or from periods with different product availability.

Recipes you can use

A price review for a small group of products

Trigger
The repricing schedule or the Run now button.
Conditions
The rule covers selected SKUs with verified costs; the strategy and the price limits match the shop's policy.
Action
The system prepares recommendations. Whoever is responsible reviews them and approves the proposals they choose.
Checking the result
Check the history, the publication result and the price in the channel. Measure the outcome after a set period, keeping the conditions comparable.
Done when

What this chapter gives you

You can read a sales result, find a pricing problem and carry out a controlled change with confirmation in the channel.

Chapter 17

Monitoring and solving problems without guessing

When an order, a document or a shipment does not appear where you expect, retrace its path. The error record and the result of the last operation tell you where to start.

What you gain

You spend less time looking for the cause and give support concrete information. You avoid repeating an operation that already partly succeeded.

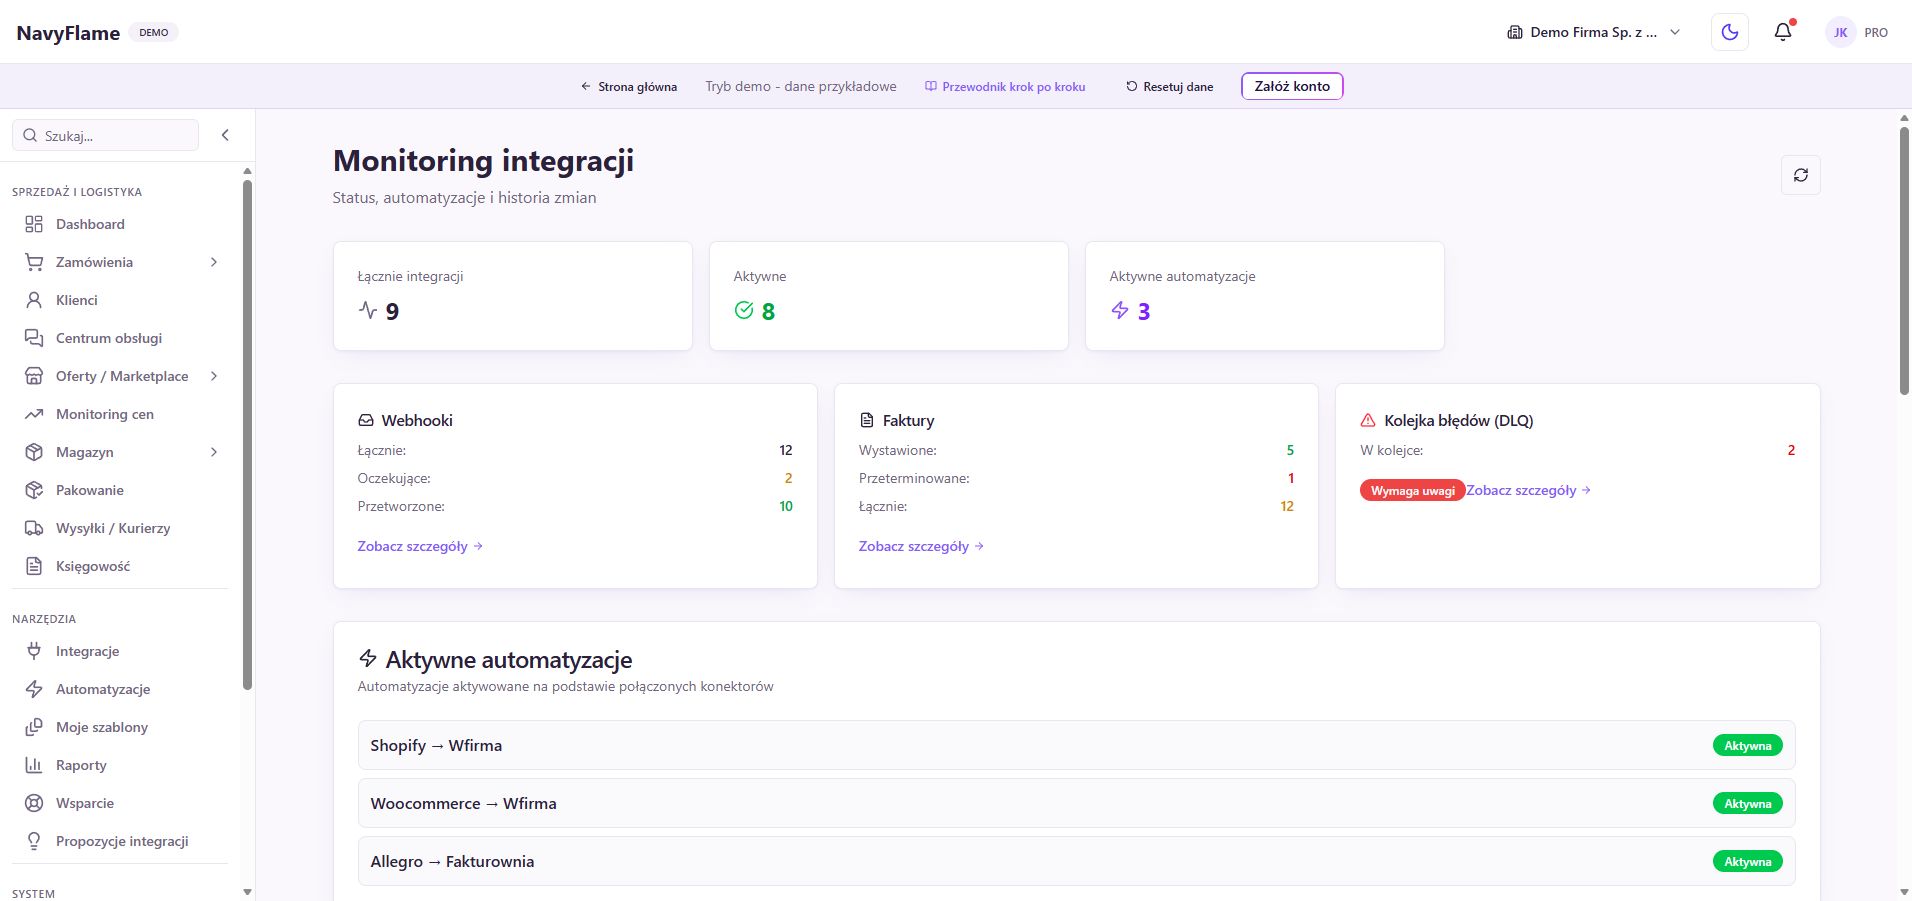
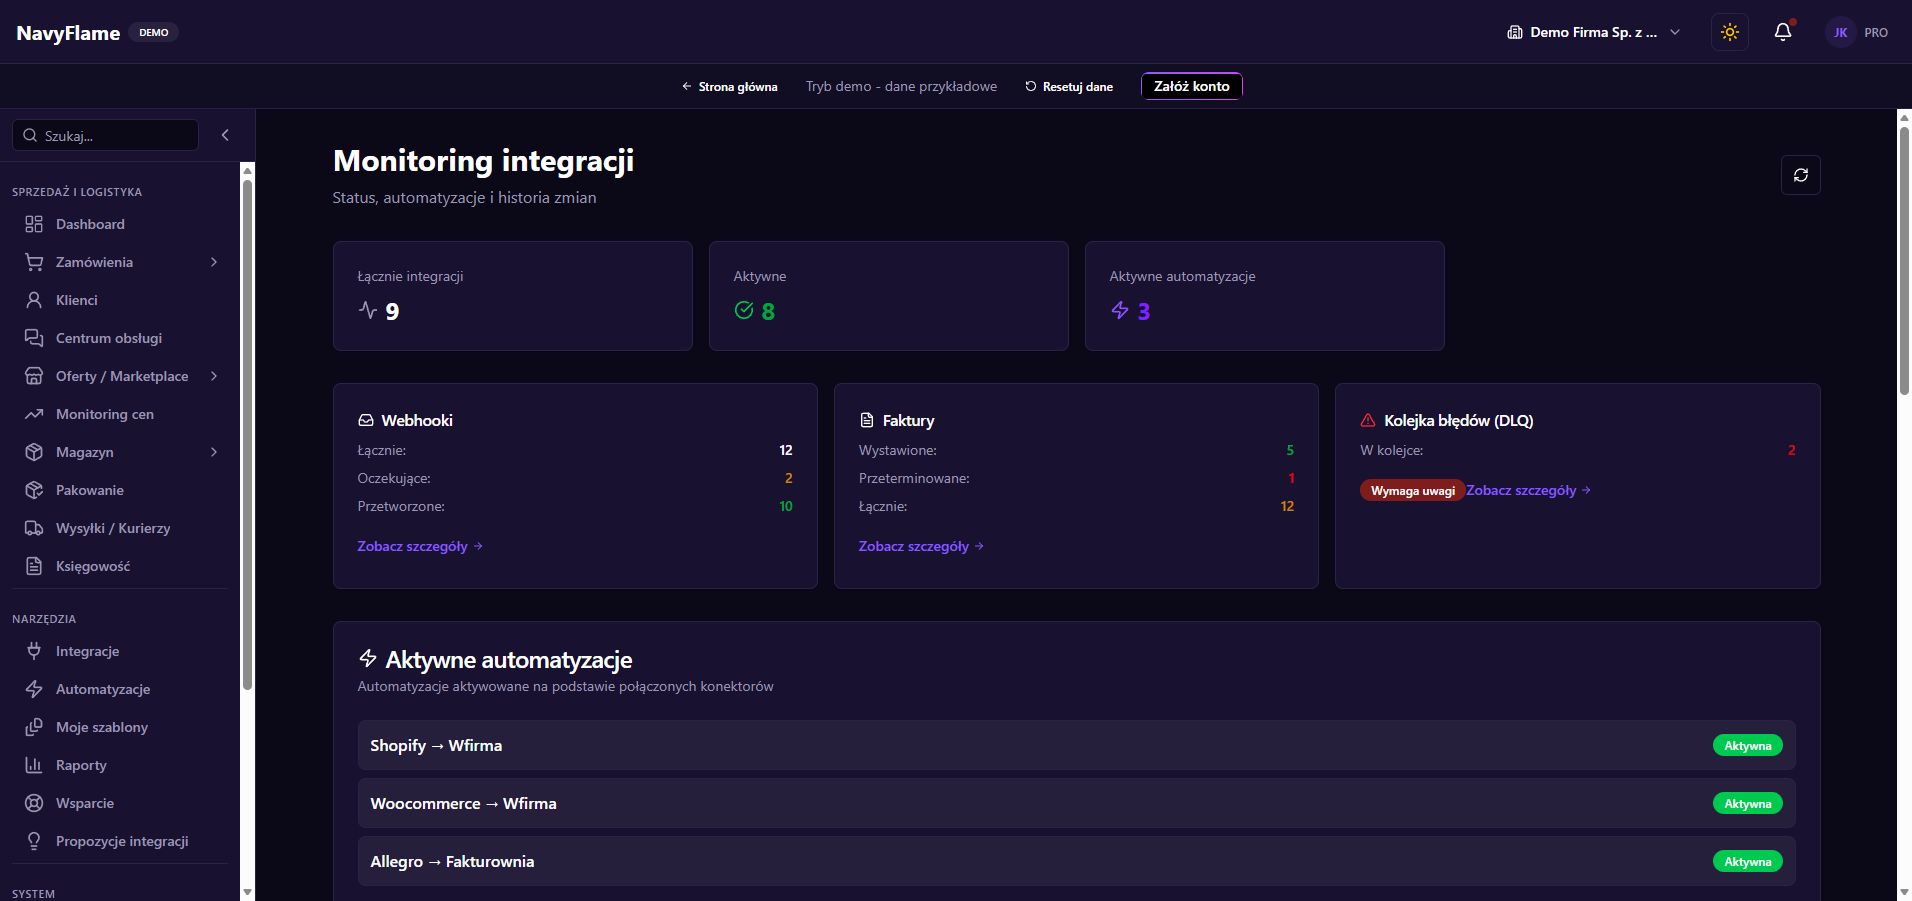
NavyFlame integration monitoring on sample dataNavyFlame integration monitoring on sample data
The monitoring in the demo shows how statuses and history are organised. Check your own account's state after signing in. Click the image to enlarge. A screenshot of the public demo with sample data.

Step by step

  1. Write down the concrete symptom

    Note the order number, the channel, the approximate time and the result expected. State whether what is missing is an import, a status update, an invoice, a label or a message. Check that you are looking at the right company and are not hiding the record with a filter or a date range.

  2. Check the starting point

    Open the source shop or marketplace and confirm the order exists and in what state. Then search for it in NavyFlame. Compare the identifier and the time. That separates missing input data from a problem at a later stage of handling.

  3. Open integration monitoring

    Look through the configuration state, the active flows and the last activity. Use Refresh to fetch the current view. An active configuration tells you about its state, but does not by itself confirm a particular import succeeded. Check the result matching the event you are examining.

  4. Look through the webhook history

    Where a process uses webhooks, go to Webhook history and narrow the source and the status. Open the details of a matching entry. If a connection fetches data on a schedule, a missing webhook is not in itself an error; look instead for the result of the relevant synchronisation.

  5. Check the error queue

    In the error queue, choose the source and read the entry's details. Establish whether the data, the configuration or access to the service needs fixing. Only once the cause is removed should you use Retry for that item and watch its new result.

  6. Check the log of the right module

    For rules, open Automation runs; for mail, the e-mail logs; for documents, invoice processing. For dispatch, go into the shipment details. Match the order identifier and the time rather than picking the first red entry from a different process.

  7. Tell data problems from access problems

    Fix a missing address field or a wrong product code in the process data. Check an expired connection under Integrations, following the provider's instructions. With a rate limit or a temporary outage of an external API, read the message about retries. Clicking repeatedly usually does not remove the cause.

  8. Check the result before retrying

    If the operation concerns a document, a label or a message sent, check the target system too. Establish whether the effect already exists despite an interrupted response. Retry only the right stage available in the panel, then verify its result from beginning to end.

  9. Give support a useful description

    Under Support, give the expected and the actual result, the order number, the channel, the time and the error or run identifier. Attach a screenshot without keys, passwords or unnecessary customer data. Say what you have already checked and whether the process works for other orders.

Done when

What this chapter gives you

You can name the stage where the problem sits, use an available retry safely, and give support the data it needs to diagnose further.

Chapter 18

API, webhooks and access control

Where the ready-made connections do not cover the whole process, prepare deliberate access for your own integration. Also put the company's members in order, and how you react to a problem with access or data.

What you gain

You extend the process with further tools while keeping sight of who has access to what. The scope of an integration is clearly defined.

Step by step

  1. Describe the need first

    Write down which data you want to read or change and in which system the result should appear. Check the Integrations available and the Data flows. Your own API use makes sense where it solves a concrete gap, rather than duplicating a connection that already works.

  2. Open Account and API keys

    Go to the API key settings. If you see access restricted, check the permissions and whether the feature is available to the company. Read the description of the scopes. Whoever builds the connection should know which operations the API genuinely offers before receiving a key.

  3. Create a separate, named key

    Click to create a key. Give it a name pointing at its use, for example "Stock report", and tick the scopes needed. For reading, do not select write permissions you do not need. Separate keys make it easier to switch off one connection later without stopping the others.

  4. Keep the key where it belongs

    After creating it, copy the key from the window and save it in your integration's secure configuration. Do not put it in a support ticket, a public repository or a screenshot. The list lets you manage keys, but does not replace how your application stores secrets.

  5. Check one operation

    With your technical colleague, make a small read following the documentation of the API available. Confirm the right company, the fields and the permission scope. Judge a write on a controlled example, with a clear expected result. Then open the changed record in the panel.

    Check: The connection carries out the operation needed and the result matches the record in NavyFlame.

  6. Add a webhook for a specific event

    In the Webhooks section, choose to add one. Point at an event from the list available and the HTTPS address of your own receiver. Keep the secret you are given and pass it to whoever implements message verification. Do not save a stray address that cannot handle the event.

  7. Check the deliveries

    On the webhook, use Send test, then Delivery history. Compare the result with the receiver's log. Your own application should handle a repeat delivery of the same event correctly. Check the first real event handled by the connection as well.

  8. Review the members and permissions

    Under Account, Members, check who has access to the company. Match their roles to their duties and remove access that is no longer needed, in line with how the team is organised. Someone who packs and a technical integration need not have the same abilities as the owner.

  9. Settle how data is restored, with support

    The user panel does not offer the self-service console for creating and restoring backups described elsewhere. Under Support, settle the procedure for your service, the scope needed and who decides. The rule history lets you restore a version of a rule, but it is not a copy of the whole company.

  10. Keep a short list of connections

    Note the integration's name, its owner, the key in use, the scope and where to check for errors. Review access after a change of staff or of tooling. When switching off an unused key or webhook, confirm that the intended connection stopped and the others still work.

Done when

What this chapter gives you

You have named connections, a verified scope of access and an agreed way to proceed if data ever needs restoring.

Chapter 19

Your plan for the first seven days

Roll NavyFlame out in an order that gives a verified result at every stage. Seven days is a suggested way to organise the work, which you adapt to the number of channels and how ready your data is.

What you gain

Rather than configuring everything at once, you build a working process from the order through to post-sale handling. You see where the system genuinely saves your team work.

Step by step

  1. Day 1: get to know the account and choose the first channel

    Check the company details, invite the people needed for the roll-out and give them roles. Go through the demo, then connect one real channel. Write down your goals: which tasks are manual today, who does them and which result you want to improve.

    Check: You can find the first imported order and the person responsible for each stage.

  2. Day 2: put products and stock in order

    Choose a small representative group of products. Check the SKUs, codes, variants, photographs, costs and how offers link to stock. Prepare the locations and check the physical count. Clear up any duplicates you find before bulk publishing and availability synchronisation.

    Check: The goods on an order correspond to the right product and the right stock.

  3. Day 3: walk through a complete order

    On one order, check the payment, the customer details, the statuses and the sales document. Settle which statuses are working ones and which confirm a finished stage. Prepare folders that help the team tell standard fulfilment from exceptions.

    Check: Whoever handles an order knows what each status in use means.

  4. Day 4: start shipping and packing

    Connect a carrier, prepare the first template and the printer. Work through picking one parcel, creating the label and printing it. Then check a small batch. Measure roughly how long a parcel takes and note where whoever packs still has to correct data.

    Check: The physical parcel, the label and the tracking number all agree.

  5. Day 5: switch on the first automation

    Choose a repeating case, for example moving paid orders into a folder. Save the draft, check a matching and a non-matching order, publish it and look at a real run. Add a verified e-mail only once you know its sender, its recipient and its wording.

    Check: You have the result of a run, not merely a saved configuration.

  6. Day 6: prepare for exceptions

    Go through messages, returns, complaints and receiving returned goods with the team. Appoint a case owner and settle how a case is handed to the warehouse. Check the monitoring and show where to look for information about an undelivered e-mail, document or parcel.

    Check: Staff can name the next step for an error and for an open customer case.

  7. Day 7: judge the result and widen the scope

    Open the reports, compare a few real orders and note the improvements. Decide whether the next step is another channel, a wholesaler, a rule or a group of offers. Extend a working pattern only once the first scope has its errors explained.

    Check: The team knows the priority of the next stage and how its success will be measured.

  8. Every day: start with the exceptions

    Check new integration errors, failed runs and messages needing a reply. Look through the oldest orders waiting to be fulfilled, payment problems and missing labels or documents. Confirm that ready parcels went out. At the end of the day, hand open cases to a named person.

  9. Every week: improve one thing in the process

    Review sales, costs, price recommendations and the recurring reasons for returns. Check a sample of stock levels and how the active rules behave. Choose one task to simplify, make the change and judge the result. Periodically review the company members, the keys and unused integrations too.

  10. Decide on the strength of your own work

    In the demo, choose three processes that matter to your business and walk them through following this guide. Then compare the plans available and check the integrations you need. If you want to roll NavyFlame out, start with an account and the first channel whose effect you can judge concretely.

Done when

What this chapter gives you

You have your own rhythm of working in NavyFlame, the most important flows confirmed and a concrete plan for growing sales further.

Ready for daily work

Tick off each area once you have verified the result on your own account.

  • From looking at the panel to your own account
  • Arrange the dashboard around your daily work
  • Set up the company, the people and their access
  • Connect your first sales channel
  • Move the catalogue and history without chaos
  • Put stock, SKUs and availability in order
  • Prepare offers, prices and publication
  • Take an order from arrival to fulfilment
  • Connect the accounting and set up documents
  • Shipping, carriers and labels ready for work
  • The packing bench, step by step
  • Automations that put the team's work in order
  • Messages and e-mails that help the customer
  • Returns, complaints and calm case handling
  • Wholesalers, deliveries and checking real stock
  • Reports and prices under your control
  • Monitoring and solving problems without guessing
  • API, webhooks and access control
  • Your plan for the first seven days

Explore the demo: navyflame.com/demo • Create an account: navyflame.com/rejestracja

This site uses cookies

We use cookies to keep the site working, to measure traffic and to personalise content. Read more in our privacy policy.

Manage preferences