
Take an order from arrival to fulfilment
Build a legible work queue, check the buyer's details and use statuses that match how far handling has actually got.
The team handles orders from one shared list, keeping track of the channel, the payment, the goods and the next step.
Step by step
Open the list and set the source
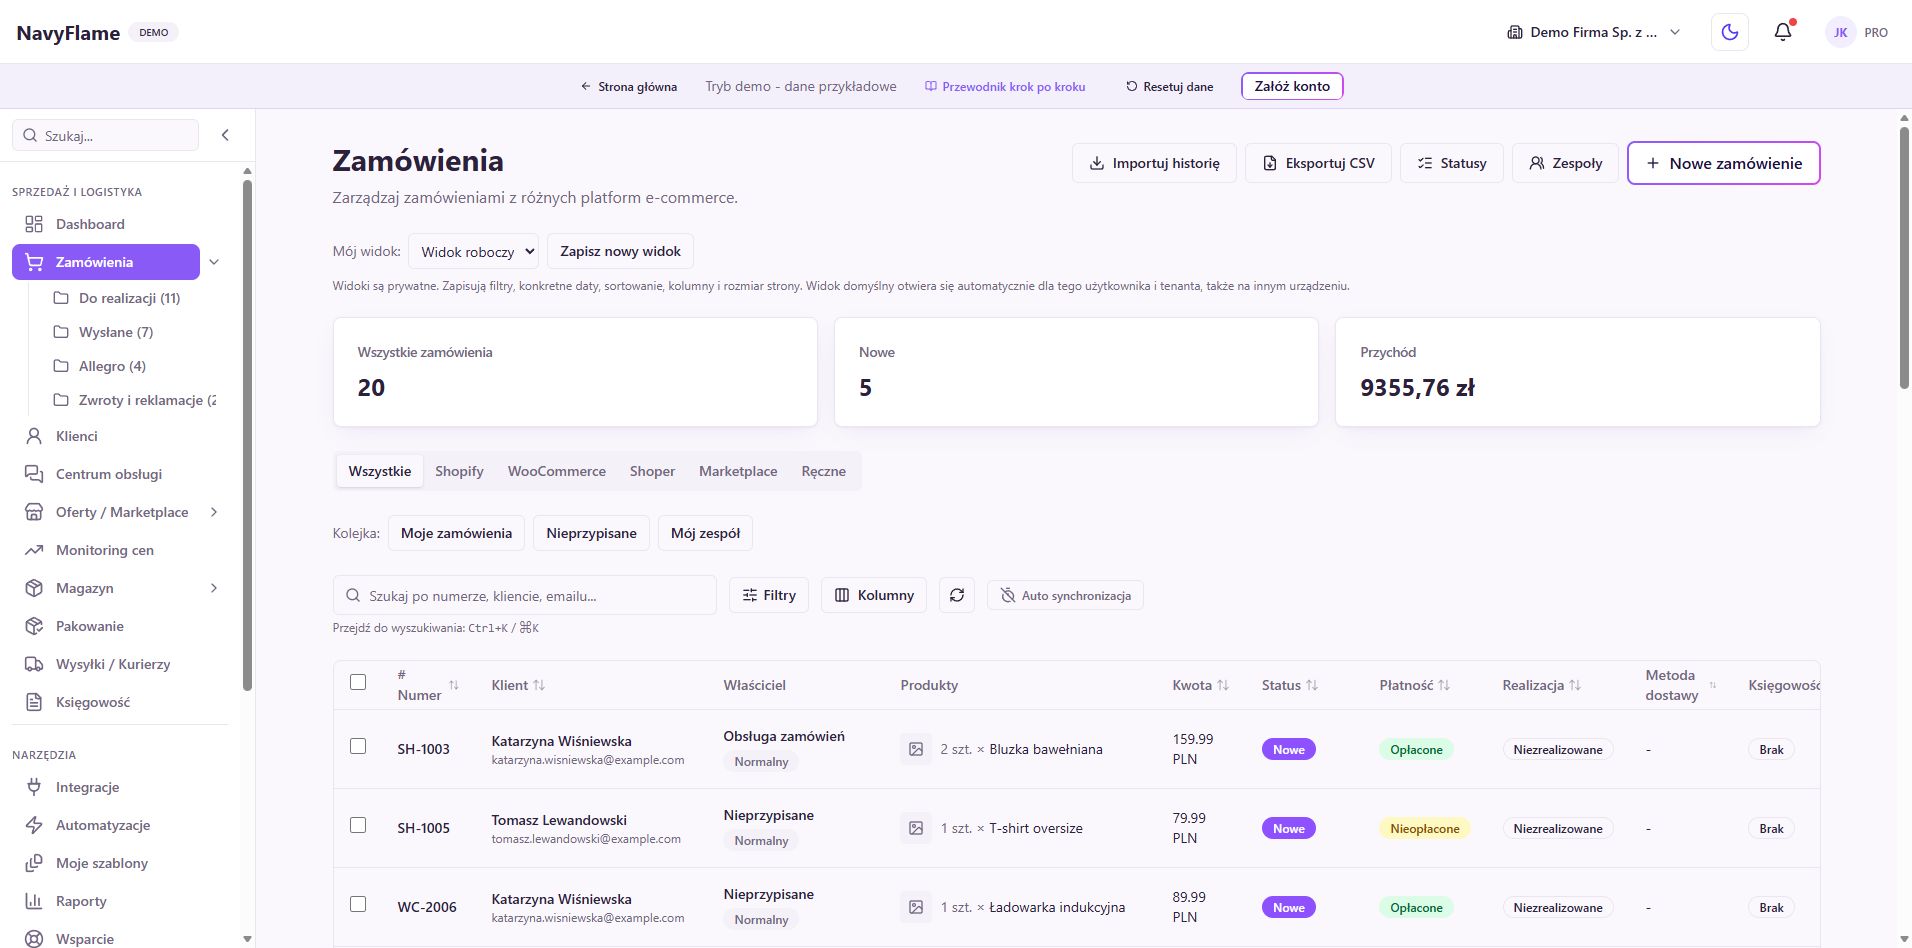
Go to Orders and choose the channel or the specific account. If you handle several shops on the same platform, watch the source name next to each order. Search for a number you know, to confirm you are looking at the right shop's data. Check too that active filters are not hiding the items you expect.
Shape the queue with filters
Set the fulfilment status, the payment status, the date range and any other conditions you need. Prepare a view that matches one piece of work, for example orders paid and ready to prepare. Tell no results after filtering apart from an empty source. Do not change statuses merely to make orders disappear from the list.
Adjust the columns and save a useful view
Use the column picker and the views menu. Keep the data you decide on: number, source, payment, status, value and whatever matters for shipping. Save the set of filters if you keep coming back to the same queue. The view's name should describe the task, not the person who created it.
Open the order details
Click the order and compare the line items, variants, quantities, amounts and currency against the sales source. Treat the buyer's details, the invoicing details and the delivery address as separate pieces of information. The party named on the document and the recipient of the parcel may differ. Watch the pick-up point where the chosen delivery method needs one.
Check: You know which goods to prepare, whom to issue the document to and where to send the parcel.
Clear up the payment and any missing details
Before going further, check the actual payment state, the method chosen and any notes from the customer. A missing confirmation on a cash-on-delivery order means something different from waiting for a transfer. Where details are missing, settle them through your own handling process and record what you need before issuing a document or a label.
Put statuses and responsibility in order
From the Orders list, go to your own statuses and the operational teams. Name the stages after what actually happens in the business, for example checking details or preparing. Before changing a status in use, check the automations that depend on it: moving to a given stage may set further actions off.
Produce the document and prepare the shipment
In the order details, check the documents section and the shipping actions available. Issuing an invoice, creating a label and packing are separate actions, described in later chapters. Read the result after each of them. That way the final status means the process really was carried out, not merely attempted.
Change statuses deliberately, in bulk as well
For a single order, choose the right next stage. For a bulk operation, select only orders meeting the same condition and use Change status. Read the summary, because some items may end in an error. If you need the shop updated too, check that separately in the channel concerned.
Check: Status, document, shipment and the actions carried out agree; the exceptions stay visible for further handling.
What this chapter gives you
Orders have a legible queue, a complete set of checked details and statuses tied to what has actually been done.
The demo lets you learn the screens on sample data. You set up your own integrations once you have an account.
Explore the demoCreate a NavyFlame account