
The packing bench, step by step
Go from the list of waiting orders to a closed and dispatched parcel. You can use a scanner, a camera or manual confirmation of the contents.
One bench walks staff through picking and dispatch. Whether the items and quantities match is visible before the parcel is sealed.
Step by step
Prepare the products and the table
Make sure order lines are linked to warehouse products and carry correct codes. Have packaging, labels and the printer ready. A scanner that types the code like a keyboard should end the reading with Enter, so the code reaches the scanning field.
Open Packing
From an order detail, choose Pack to start its session. If a session is already open, check the order number and saved progress, then choose Resume session. The default queue shows paid, unfulfilled orders, oldest first. If you need a particular batch, select the orders on their own list and start packing that set.
Check: The number on screen matches the order whose goods are on the table.
Check the lines before scanning
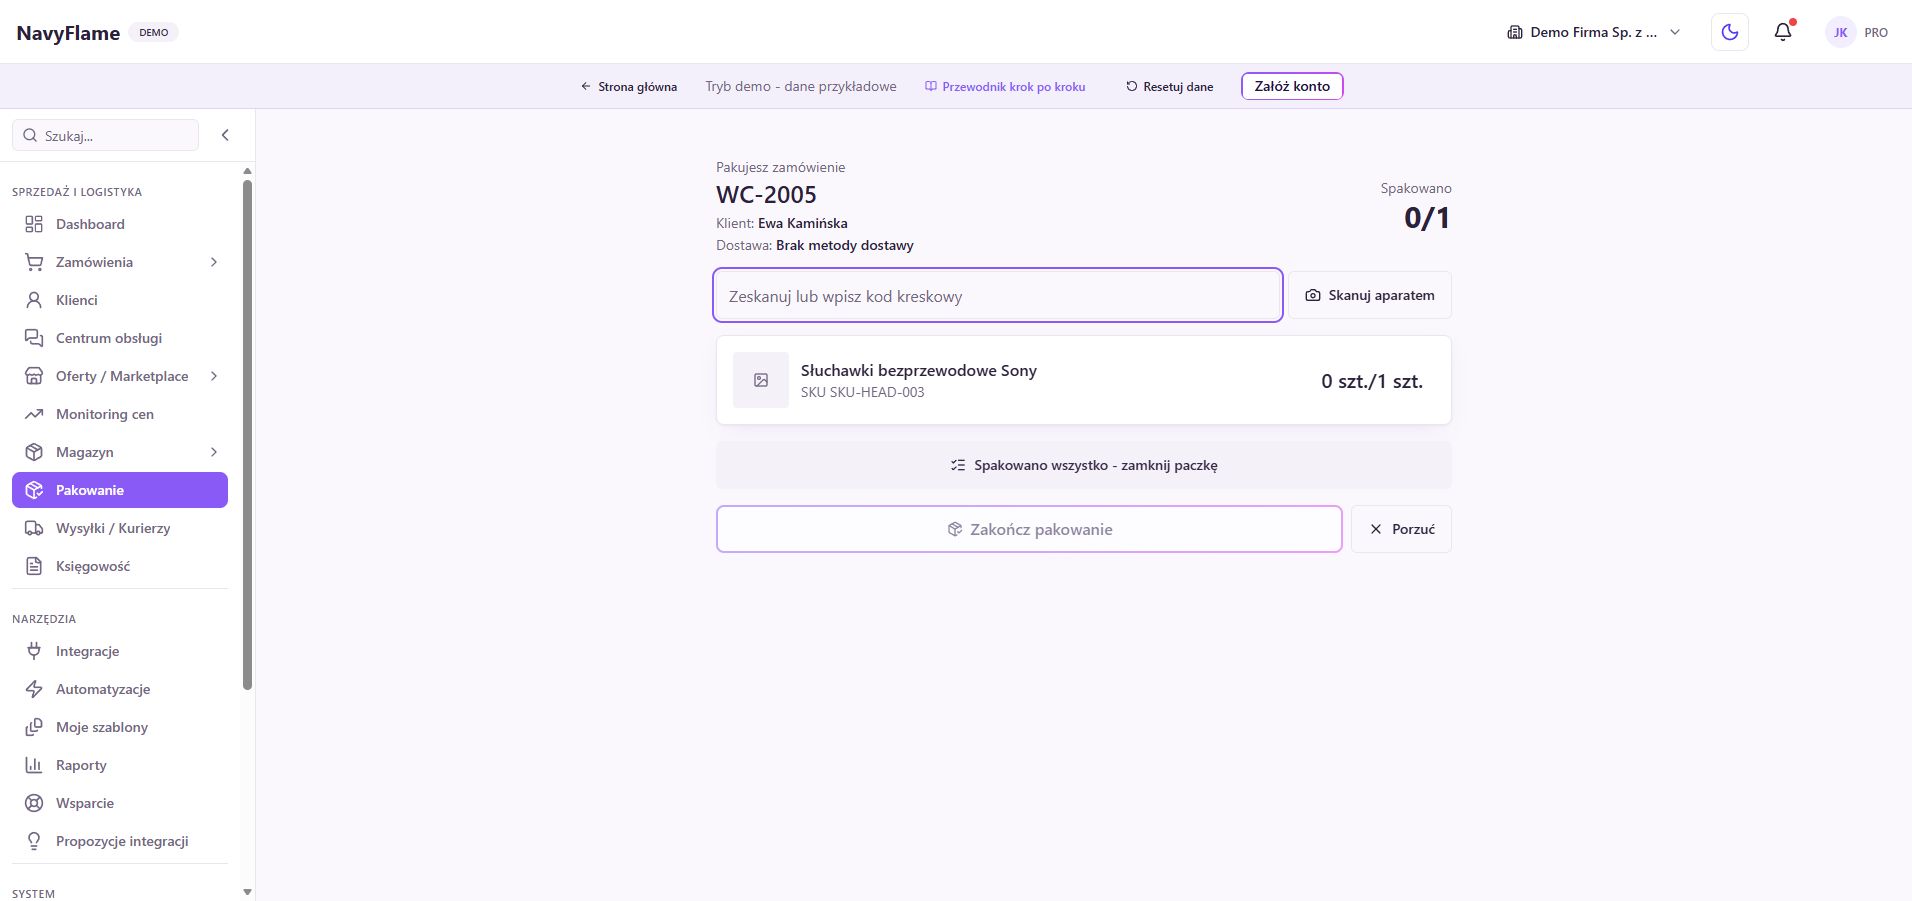
Compare the name, photograph, SKU and the quantity required. With variants, watch the size and the colour. The counters show progress for each line. Do not substitute a similar product without clearing it up against the order.
Scan every piece you set aside
Put the cursor in the Scan or type barcode field. Read the code with the scanner, or type it and press Enter. You can also click Scan with camera and grant the browser access to it.
Check: The right line's counter goes up. A message about a code that does not match needs clearing up before you go on.
Handle an exception deliberately
A line with no warehouse link may need the Confirm button. Look at the product and count the quantity before confirming it by hand. If a reading was wrong, use the undo on that line. Then fix the missing product link before the next orders.
Without a scanner, confirm the physical set
If you pack by hand, count every line and click "Everything packed, close the parcel". That is the packer's confirmation and the move to dispatch. Use it only after really checking the contents, not as a way past missing products.
Finish a complete session
When scanning, bring every line up to the quantity required and click Finish packing. If you are stopping because of an error, consider Abandon. On returning, the saved progress is still there, but resuming requires deliberate confirmation.
Work through Dispatch parcel
Once picking is finished, choose the prepared shipping template. Check whether its settings order a label or create a draft. Take the printout and stick it on the right parcel. Closing the packing session does not by itself mean the parcel was dispatched successfully.
Check: The parcel carries a label matching the order, and the dispatch result is confirmed under Shipping.
Set the rhythm of the bench
The option Open the next parcel after dispatch speeds up batch work. When entering from an order detail, you can instead enable Return to the order after packing. Both preferences are remembered in the bench's browser. For a chosen batch, the panel keeps the queue of selected orders.
What this chapter gives you
Whoever packs can pick, check and dispatch a parcel, and recognise the situations that need a human decision.
The demo lets you learn the screens on sample data. You set up your own integrations once you have an account.
Explore the demoCreate a NavyFlame account